Building the Lily58 keyboard
I built my first mechanical keyboard this summer.
This post ended up being rather long, containing a lot of images and text. I’ve written about my keyboard preferences, problems during the process, my future plans and much more, and didn’t really want to leave anything out. There’s a table of contents below so you should be able to find the parts that are most relevant to you.
- Background
- Building process
- Software
- The new order of the desktop
- Known issues
- Future plans
- Video: keyboard sound and typing exercise
- Glamour shots
- Final thoughts
There’s a great change that I may write a follow-up post to this at some point. If you’d like that, consider joining the Telegram channel. It’s the place where you’ll get notified of the new posts right after I publish them.
Background
I ordered a keyboard building set from the UK, which means I had to pay VAT to Finland when the set arrived. This is my first non-ordinary keyboard, thus selecting the keyboard was more or less lottery.
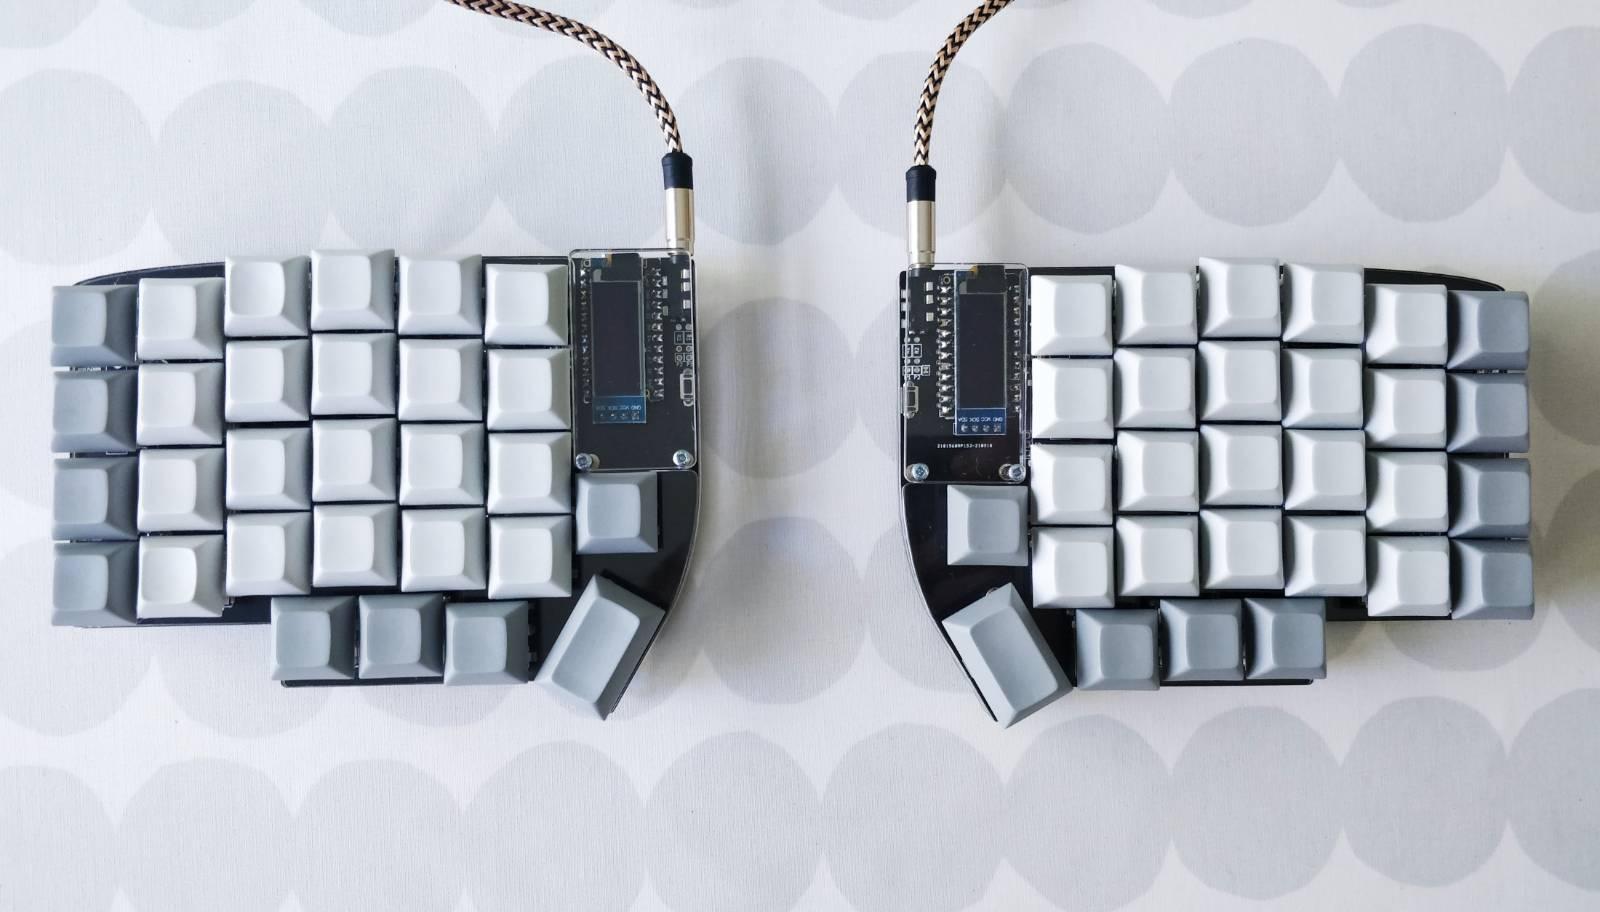
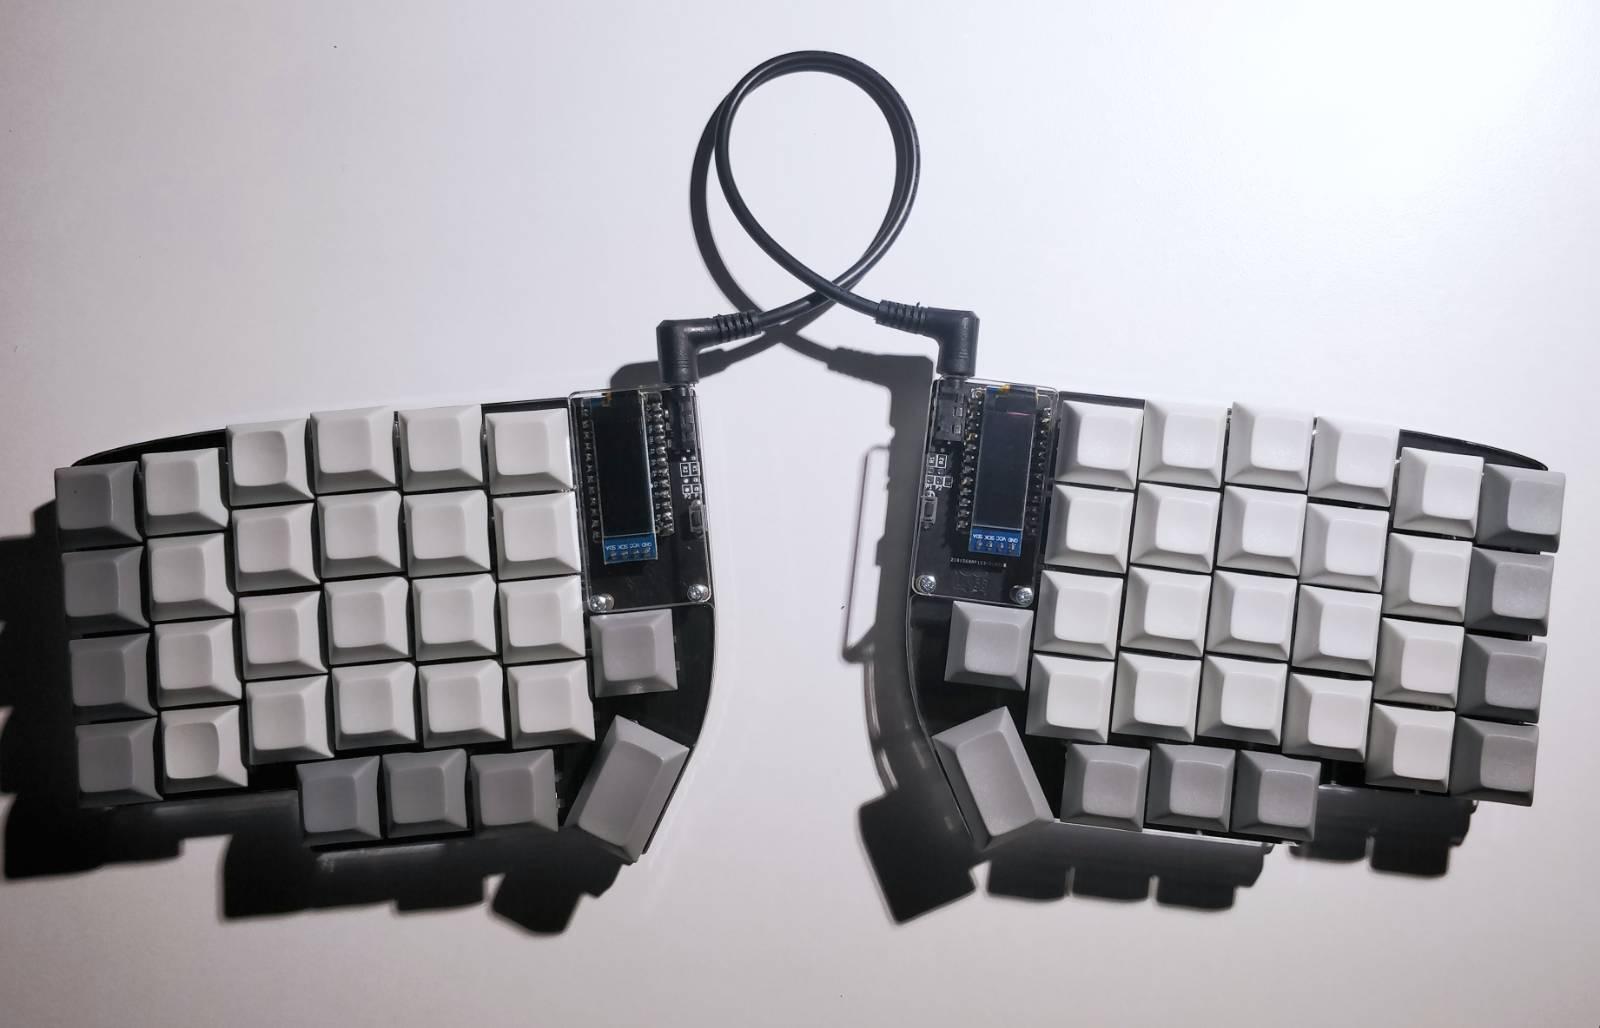
I ended up selecting a split keyboard called Lily58. According to its name, it has 58 keys, 29 in each half.
Before I’ll describe the building process and present the completed keyboard, I’ll tell a bit background about my choice.
Switches
Lily58 is a mechanical keyboard, meaning it has a real, independent, replaceable, mechanical switch for each key. Ordinary keyboards use cheap membrane switches with shorter lifespan and worse typing feel. There are a lot of mechanical switches from different manufacturers to choose from. I only tried some switches of two significant manufacturers, Cherry and Kailh. Of course I fell in love with clicky switches that make that satisfying sound when pressed. However, I ended up choosing Kailh Box Browns, which felt pretty similar (but a bit better) compared to the well-known Cherry Browns. I didn’t want the keyboard to produce immense clicky sounds every time I type on it—that would likely not be acceptable at neither home or office—and I wasn’t that convinced of the linear switches, that have a constant resistance all the way.
Even though I chose the Kailh Box Browns, I did order additional switches to experiment with. Currently I think I’d be happy with any switches, because after trying a bit of everything, I state that I can easily get used to different switches. They are just different with differing pros and cons. Browns have been great, and if I ever wanted to try something different, I could just order a set of switches and just change them without even soldering.
Lily58 compared to other keyboards
The most odd thing is likely that it’s a split keyboard, meaning it has two halves. Split keyboards are said to be more ergonomic, as the user does not need to force their hands to an unnatural position near each other, but they can rest in a natural position instead. I thought having a split keyboard seems cool and fun, and if it’s also more ergonomic, that’s even better.
Another significant difference to most mechanical and regular keyboards is the placement of the keys. In the most used layout the lines are staggered, meaning the lines are straight but columns aren’t. I’ve tried to illuminate that in the drawing below, where this traditional staggered layout is marked with a).

In Lily58 the columns are straight, but rows aren’t. It’s called a column-staggered layout, and I’ve illustrated it in the drawing above as b). I also find the ortholinear layout, illustrated as c), very interesting, even though I didn’t choose that this time. In ortholinear keyboards both lines and columns are straight.
According to some people, keyboards with straight columns are more ergonomic. I don’t have enough knowledge or experience about that, but I do like the layout and the placement of the keys feel more logical. Every character is exactly above or below some other character, and that just makes sense. I know what finger I should use for each key, and that has helped me to improve my typing style. I even noticed that I used “wrong” fingers for some keys, but relearning to do it right wasn’t actually difficult at all.
Personal and general keyboard history
This isn’t the first time I’ve made dissident keyboard choices. In secondary school I switched to Dvorak layout. I learned to type without looking at the keyboard, thus typing faster than using traditional qwerty layout. Dvorak is considered more ergonomic than qwerty, of which the latter is designed so that consecutive keypresses are far of each other, so that the typewriter wouldn’t get jammed. Dvorak, on the other hand, is designed so that it’s as effortless as possible to write English with it.
In my opinion it is pretty stupid, that keyboards have a lot of unnecessary relics from the era of typewrites included just for convention. As far as I know, the very central placement of the Caps Lock and staggered keyboard layout are also legacy of the typewriters. I’ve already solved the Caps Lock issue by switching it with Esc. This is really convenient especially when using the vim text editor, but also generally: I almost never use Caps Lock, and I use Esc all the time, so to me swapping them makes a lot of sense. In a way choosing a little odd keyboard is also a statement. Things don’t necessarily have to be done like they’ve “always” been done, if the only reason is that it’s what people are used to—not what would be best for them.
Building process
I followed this guide. Unfortunately, I had to rely on trial and error at times, as the guide isn’t perfect and I had a different microcontroller.
I built the keyboard one half at a time, beginning with the right one. I am by no means an experienced solderer, and even though some of the joints are ugly, they mostly work.
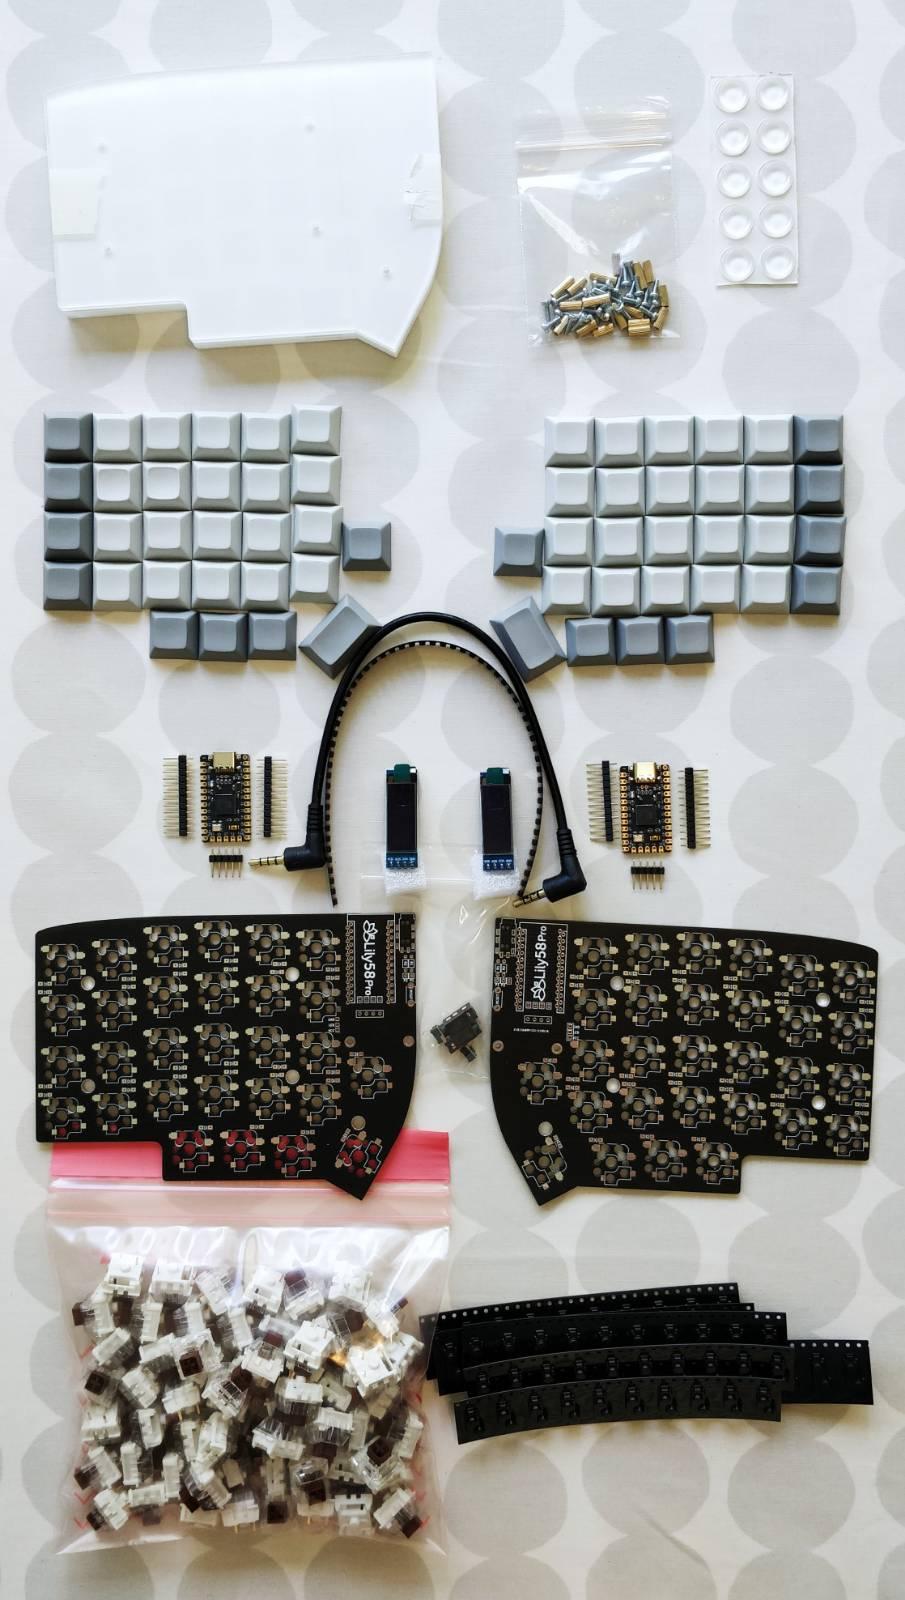
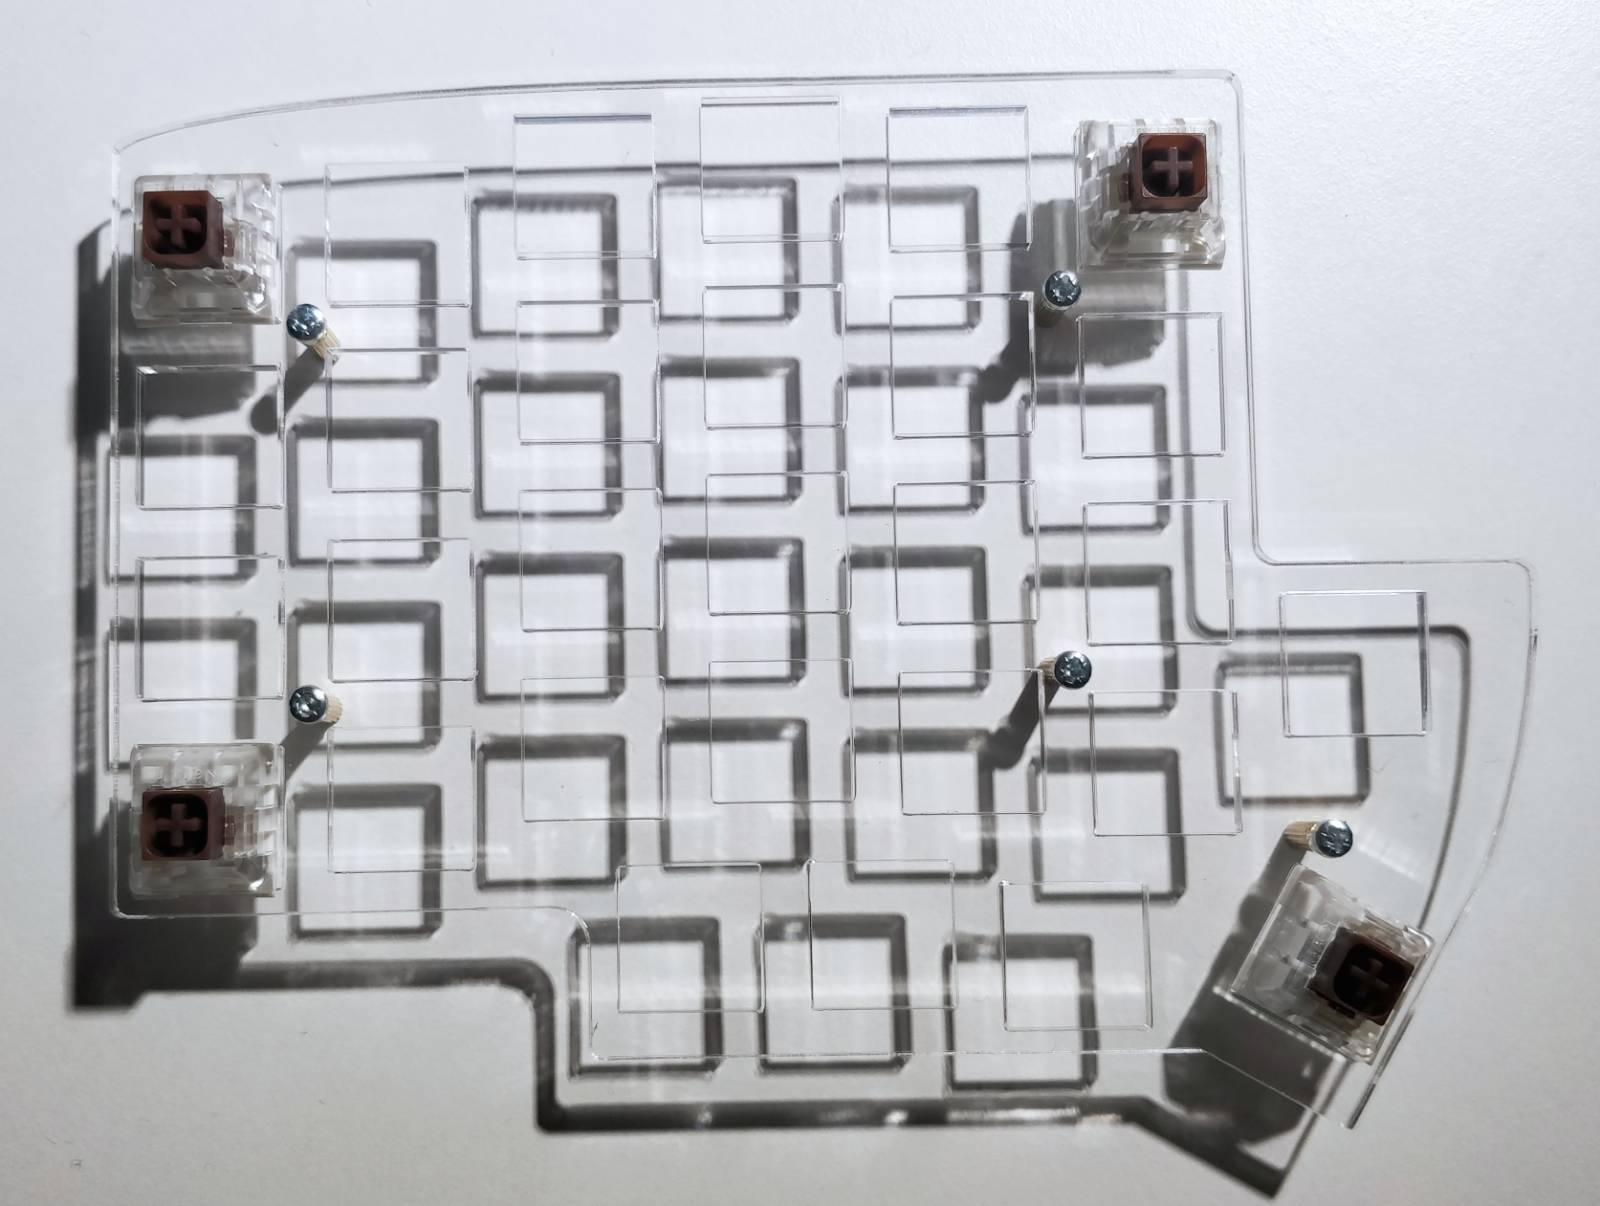
The set includes two identical PCBs.
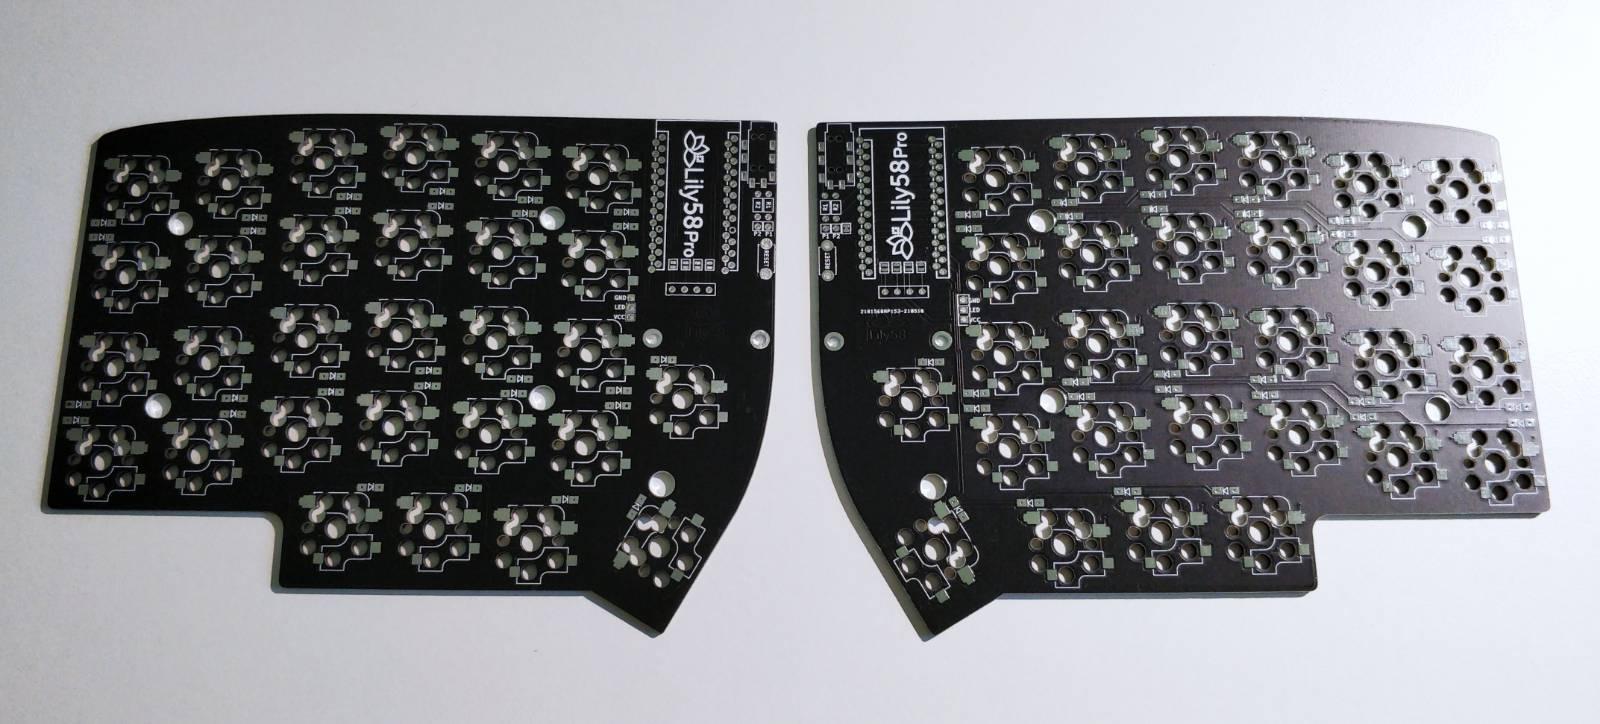
The PCB is planned so that it can be turned over to build the other half. That’s neat design, if you ask me.
First I soldered the diodes to the back side of the PCB. As the back and front side depend on the half, it’s best to use tape to mark the front side of each half.

There are a lot of diodes, and they are really small. Handling them was difficult even with tweezers, but eventually I got each of them properly soldered.
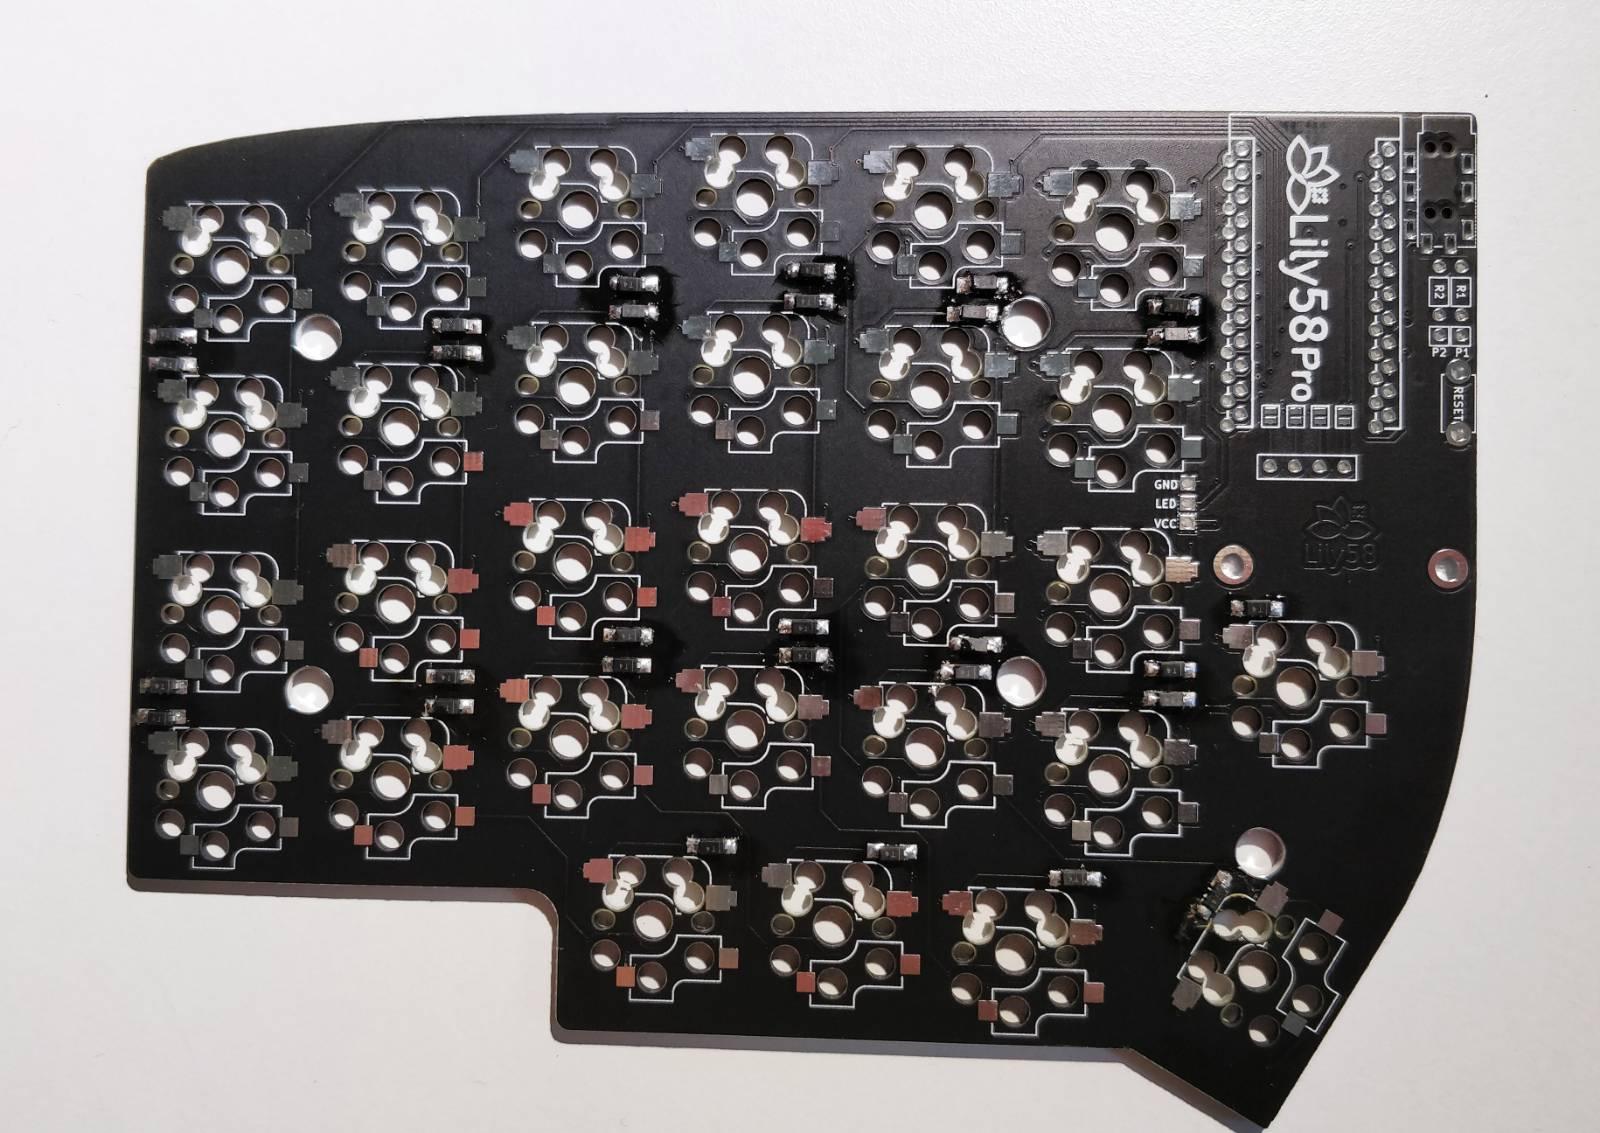
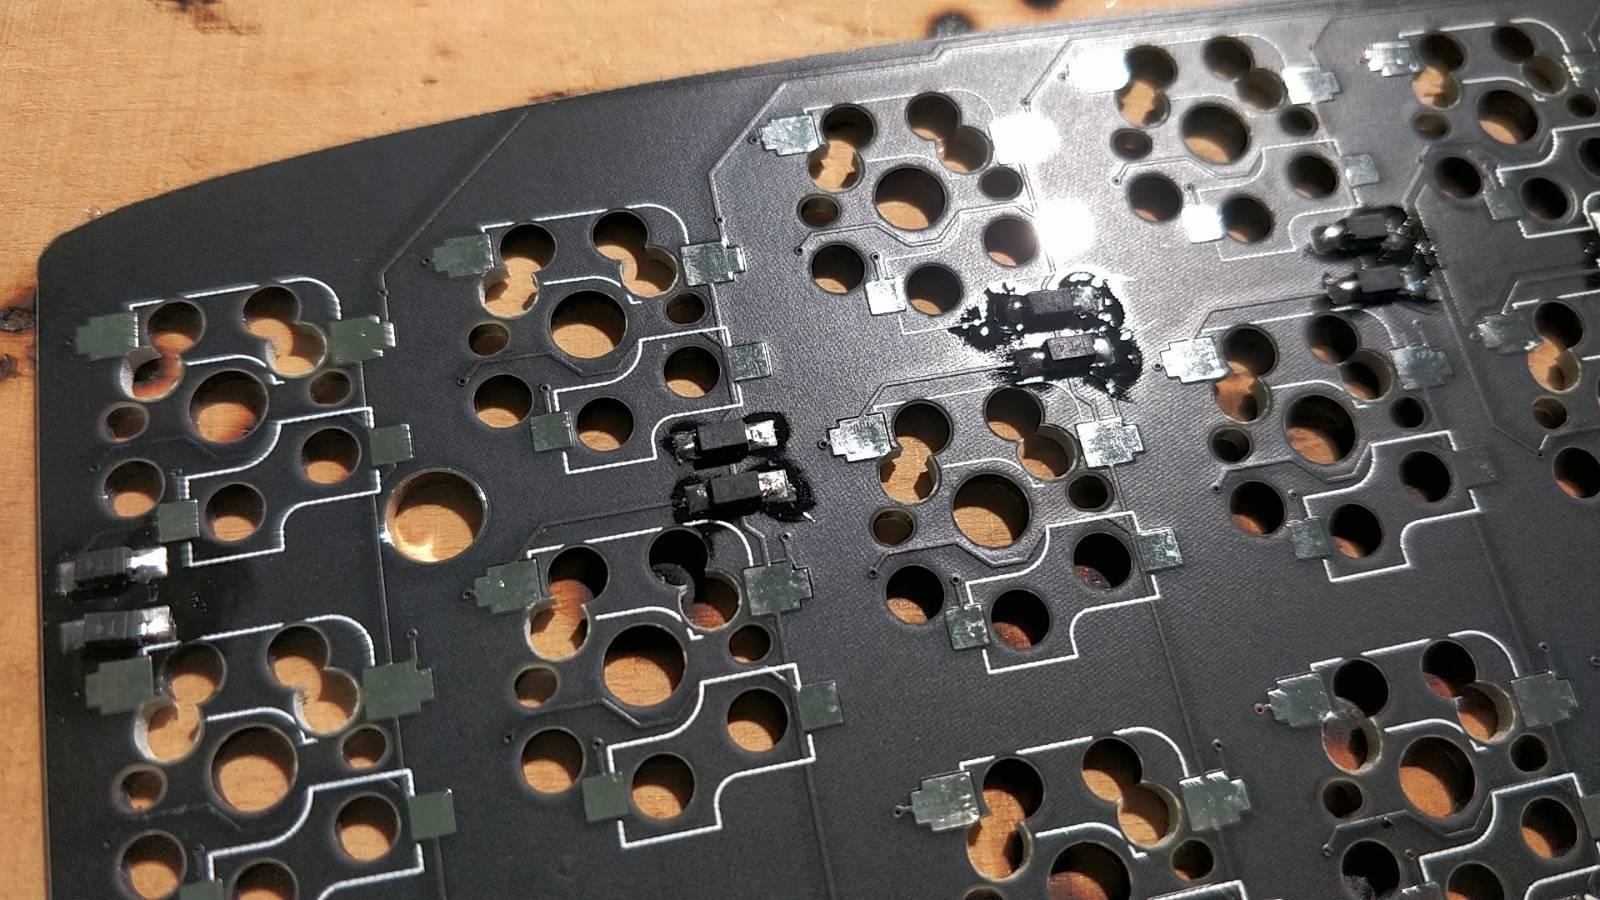
Then I installed the switch sockets to the back side of the PCB.
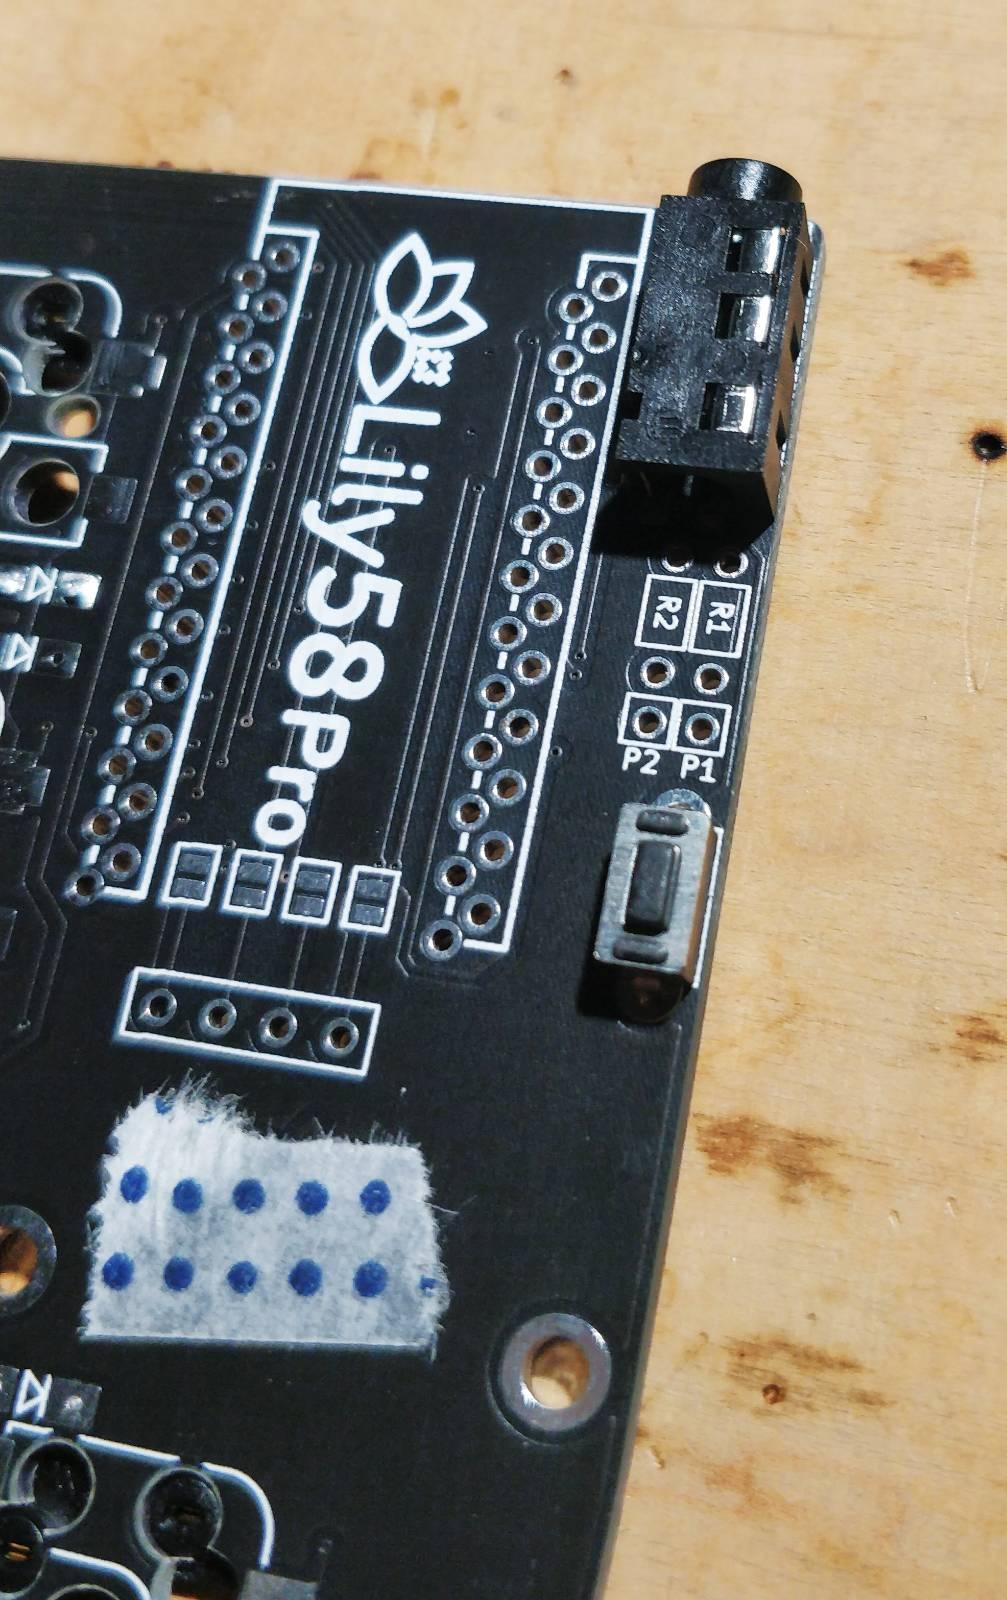
Next I soldered the reset button and the connectors that the TRRS cable uses to connect the two halves. The tape indicating the front side of the PCB can also be seen in the picture.
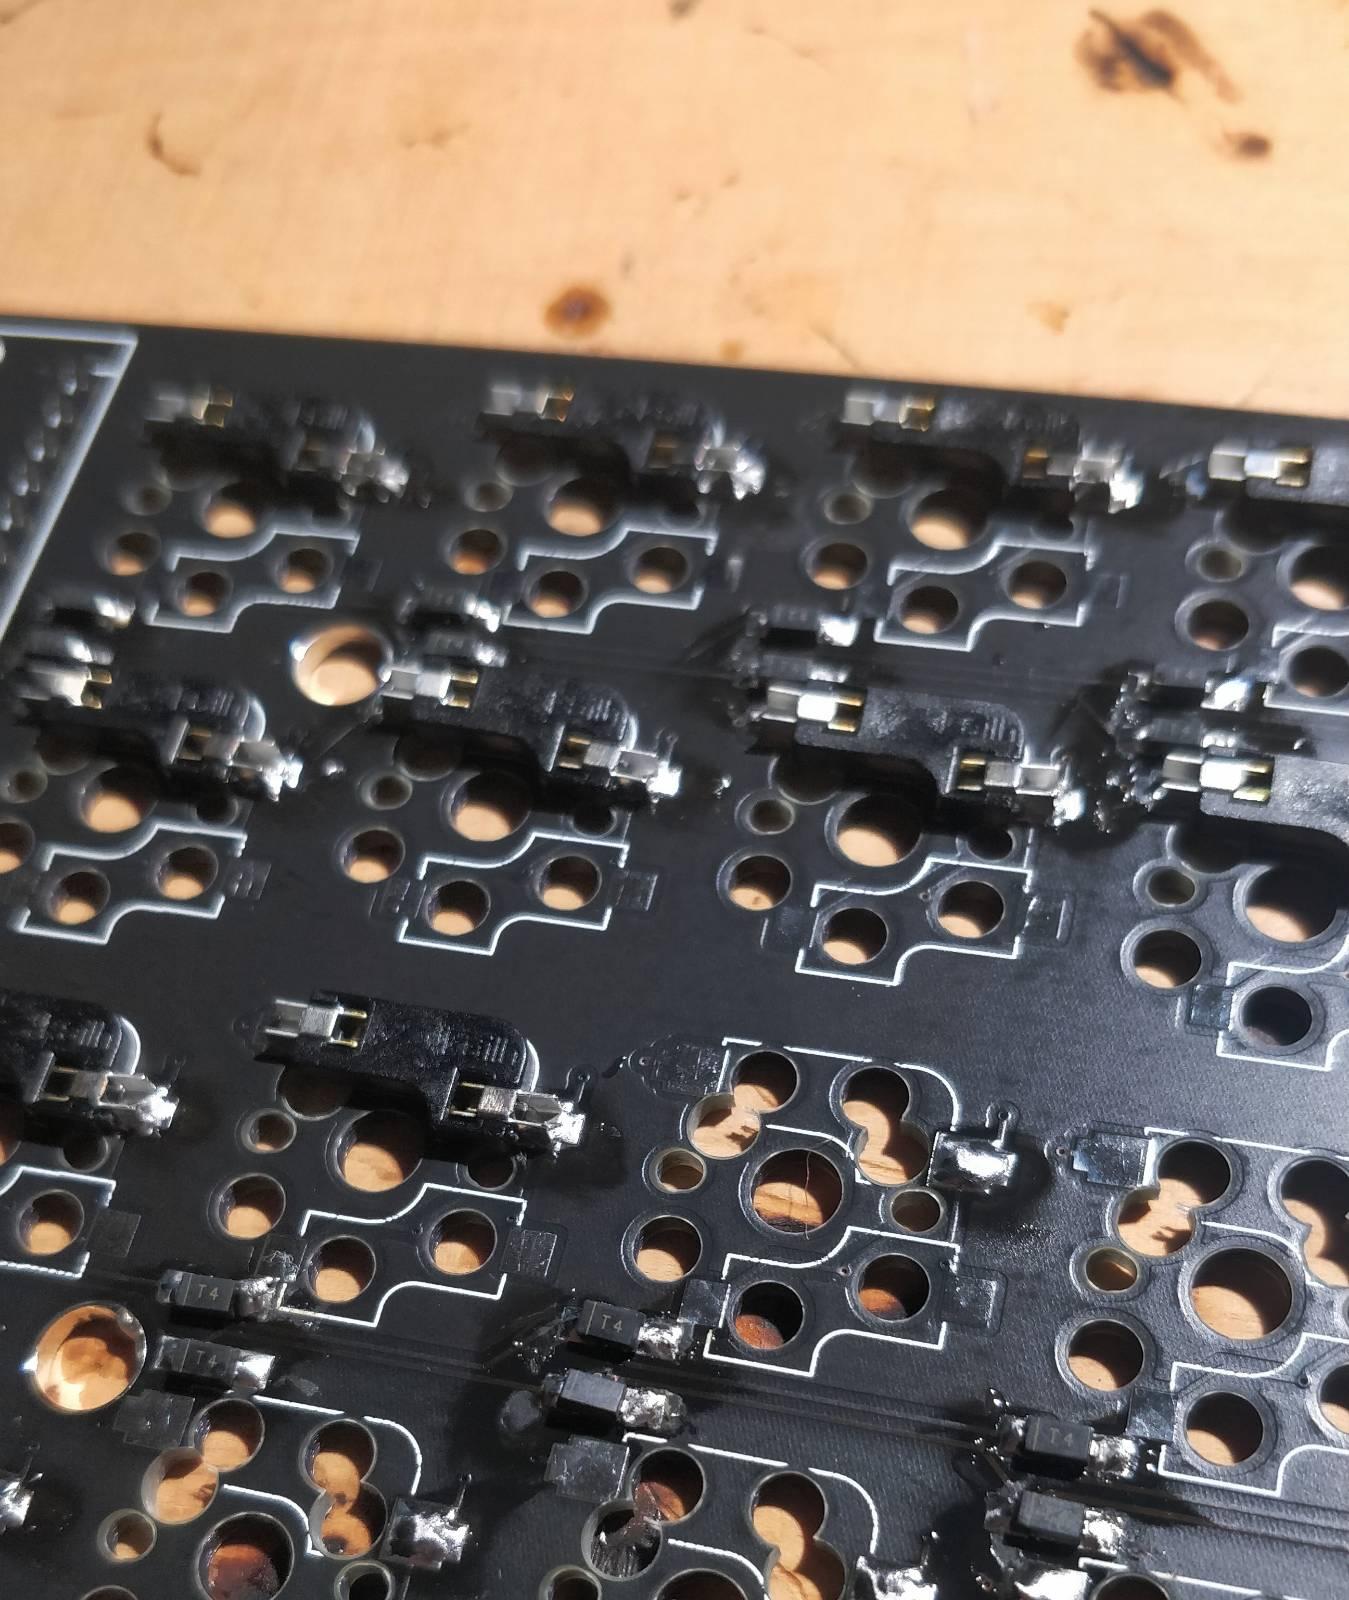
This was the part where the instructions were a bit unclear. I soldered the display connection as instructed, but due to being inexperienced and careless I managed to destroy part of the PCB. This is very likely the reason why the display of the right half does not work. I was frightened that my error would render the whole keyboard inoperable, but fortunately that wasn’t the case.
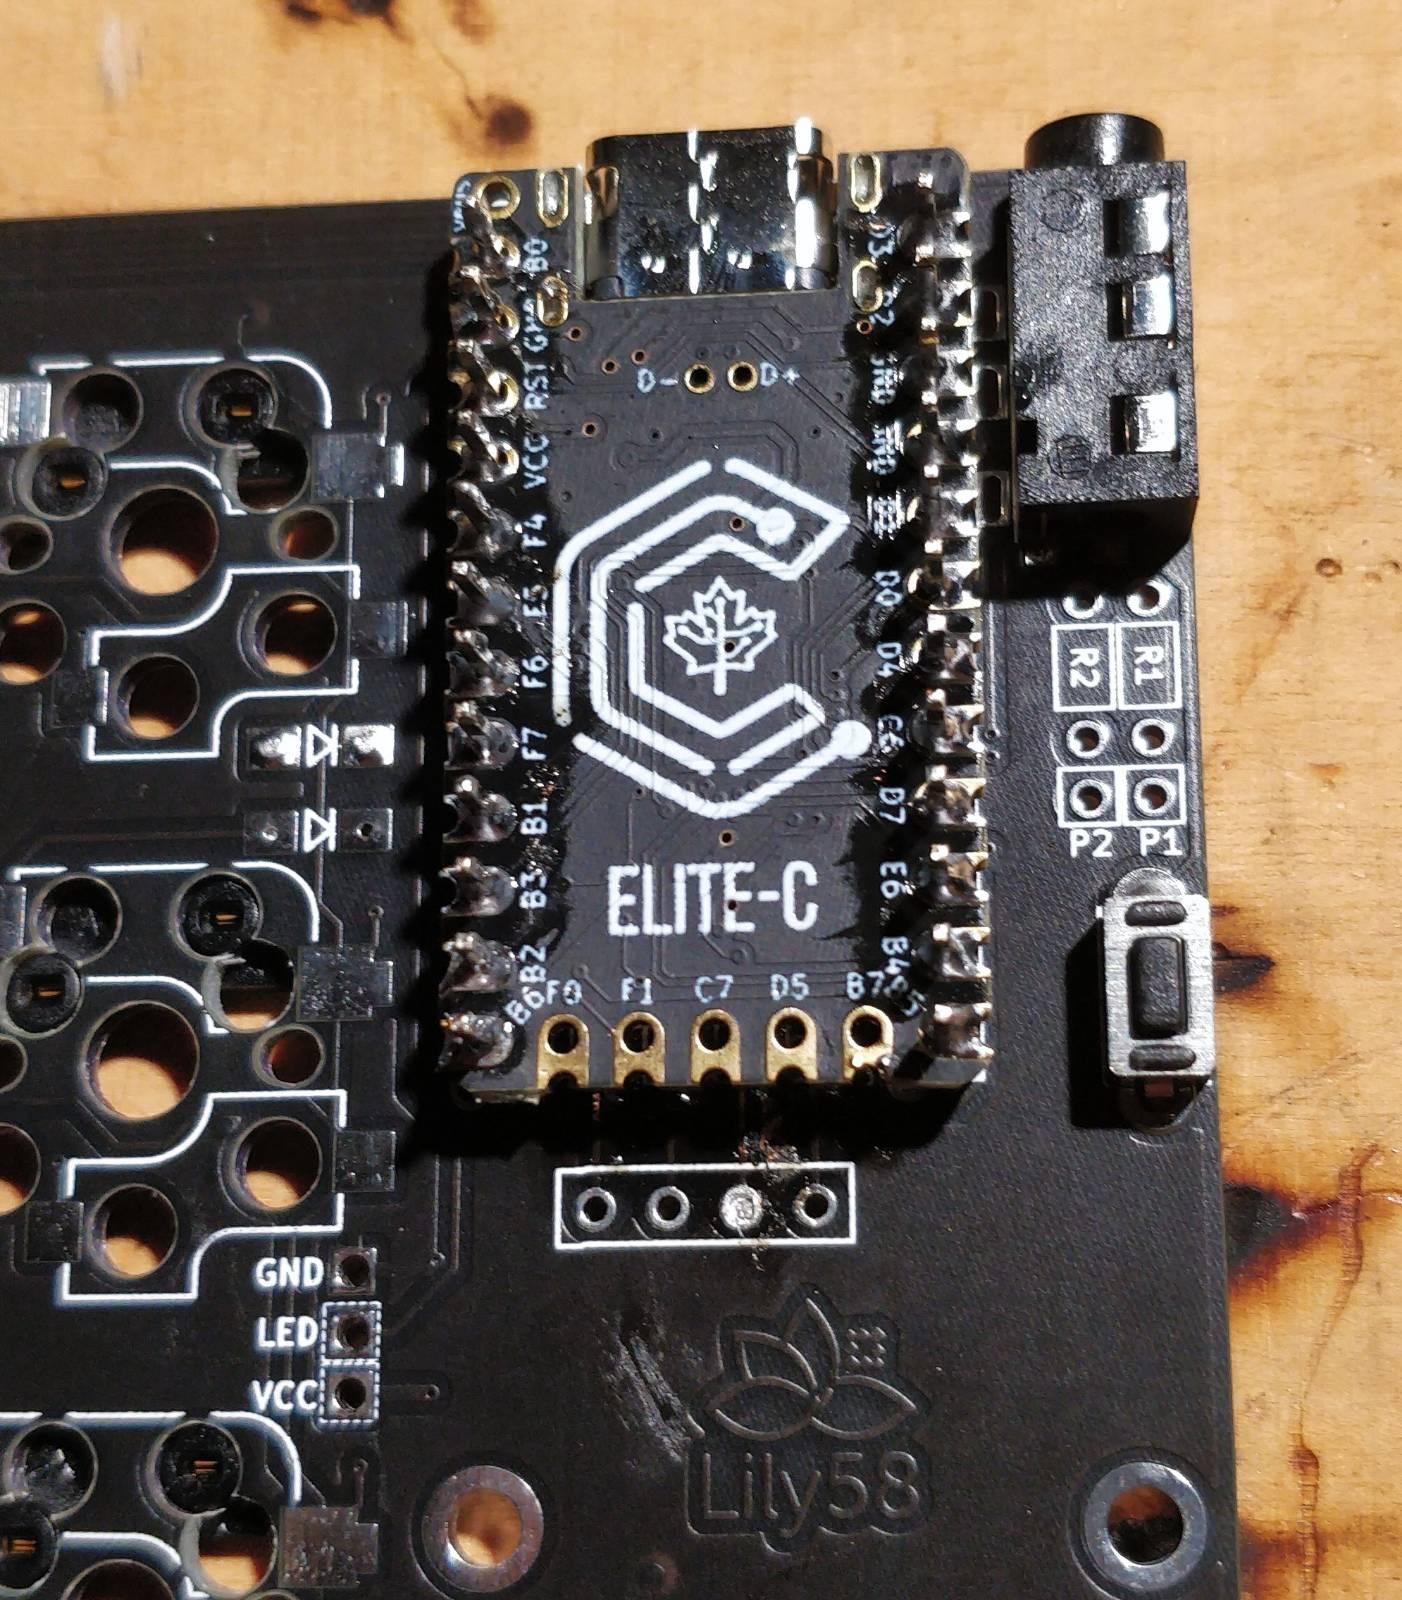
After this mistake I soldered the microcontroller to its place. That didn’t go too smoothly, and I was afraid that I’d be incapable of connecting the controller completely. Luckily I could gently bend the pins to install it, and understood to install the controller of the second half in different order.
After this I soldered the display to its place on top of the microcontroller.
The most difficult part was the soldering.
Next I placed some switches to the case for connecting to the PCB.
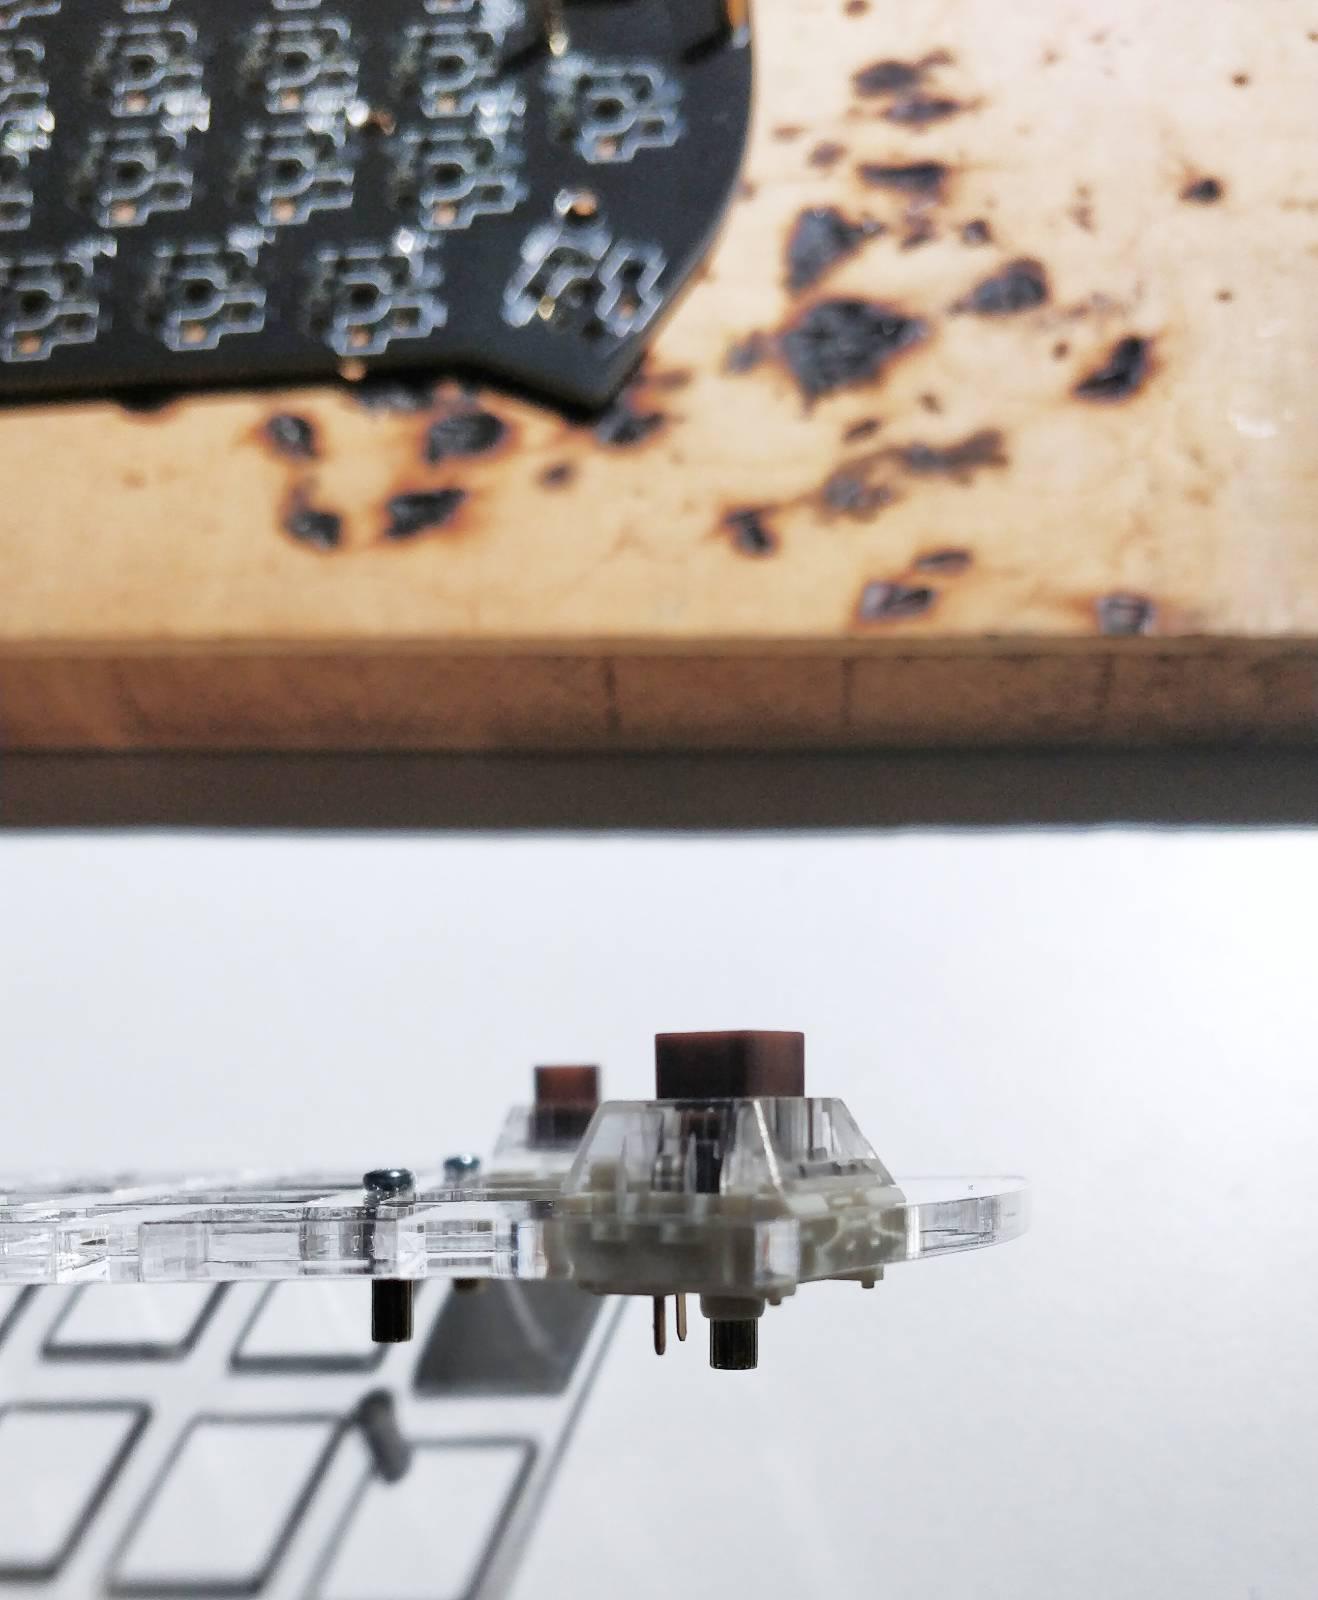
Then I installed the case and switches to the PCB.
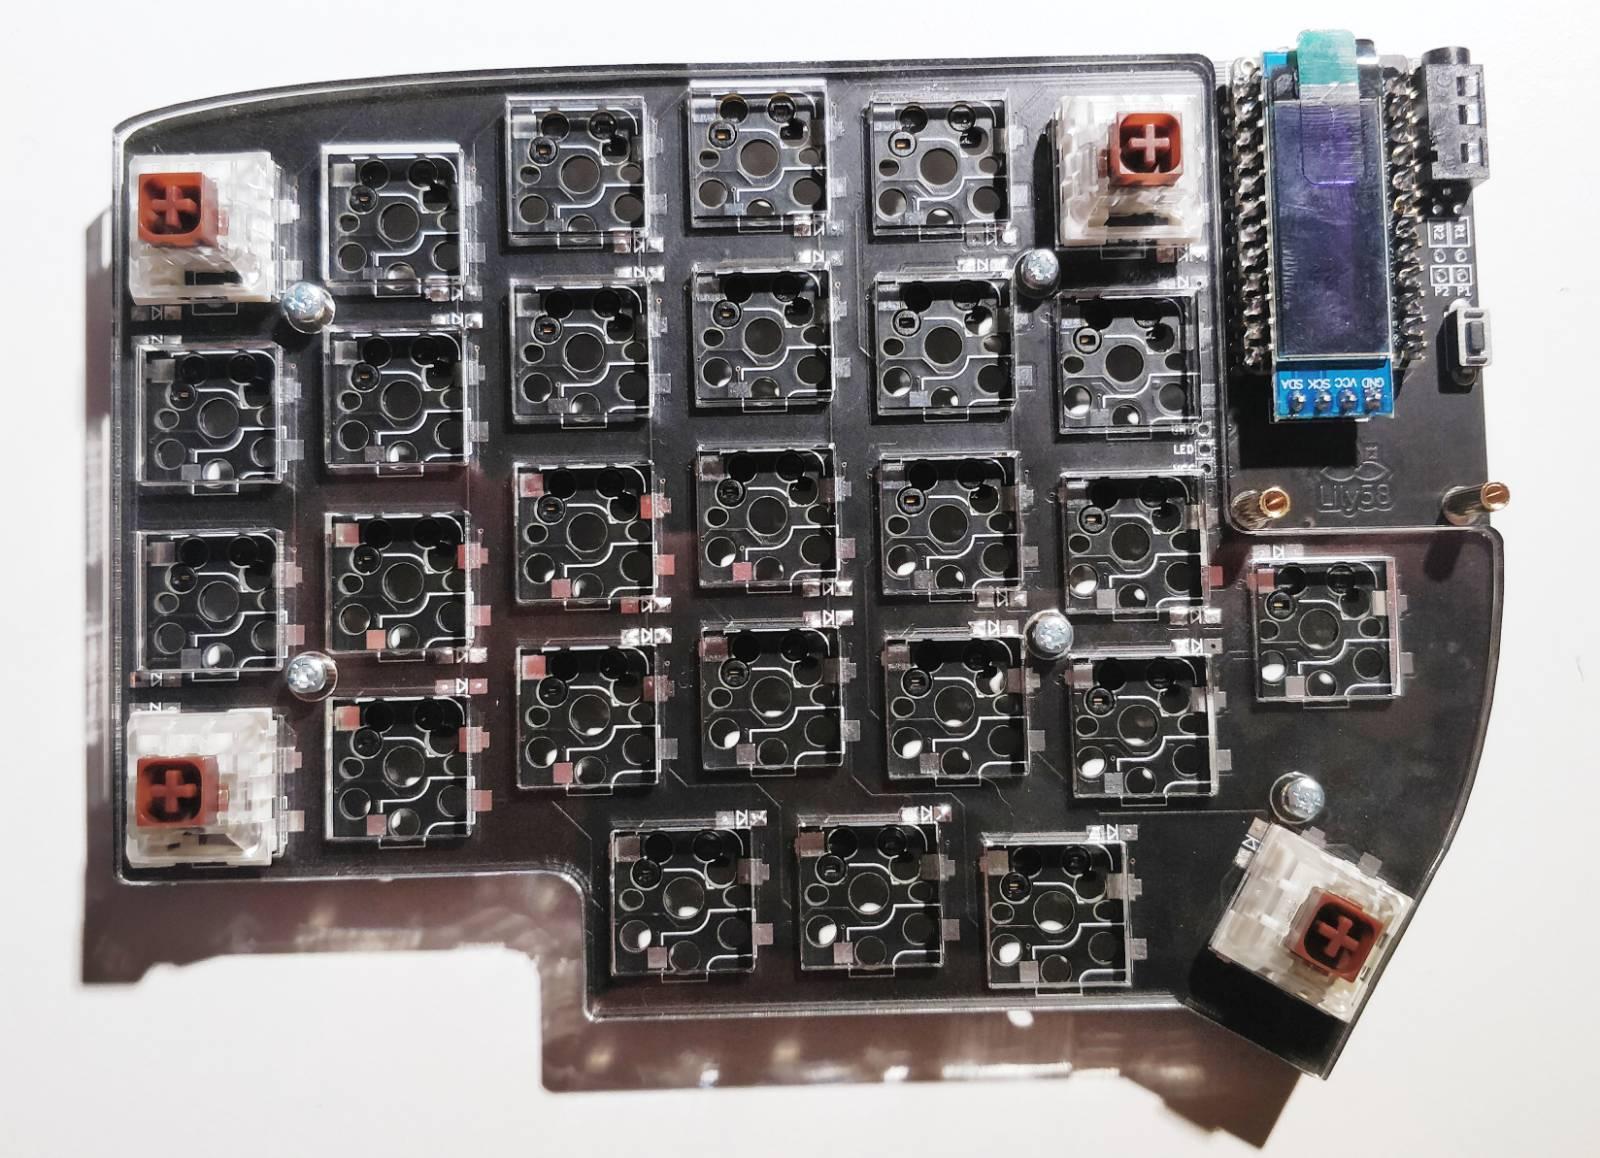
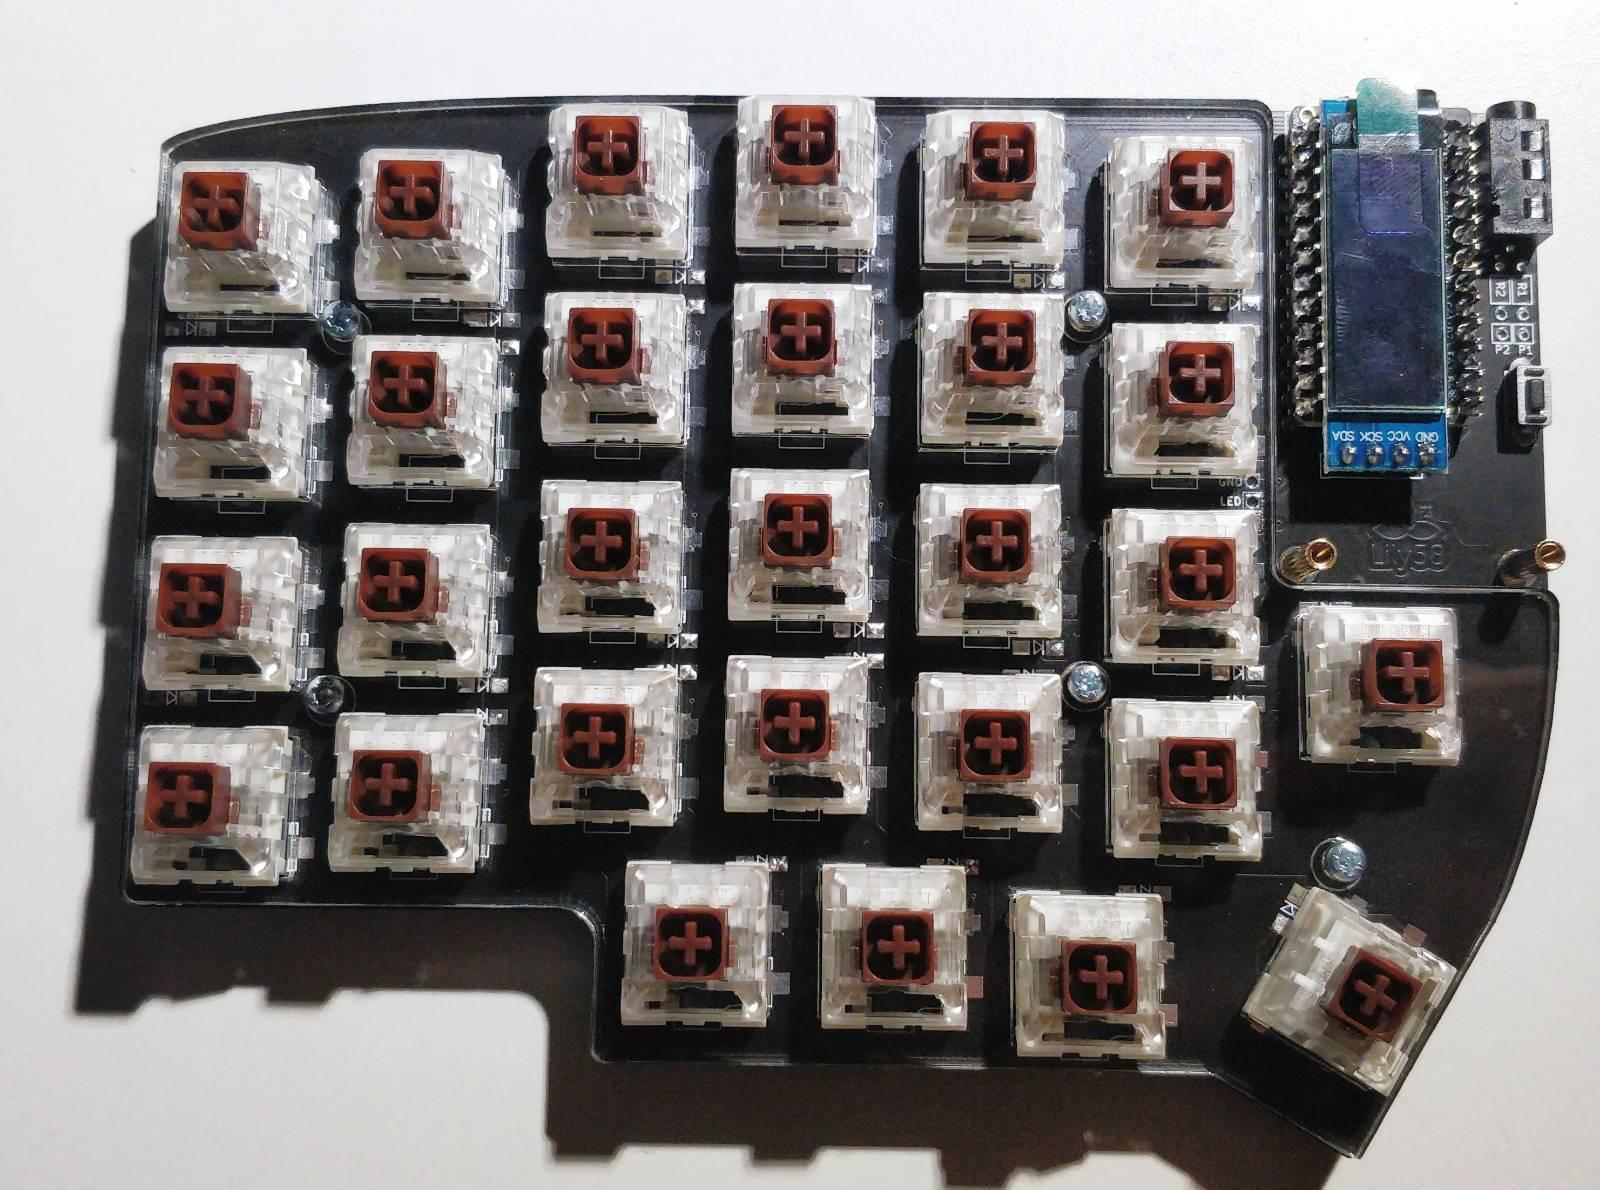
Installing the rest of the switches, from the center towards the edges.
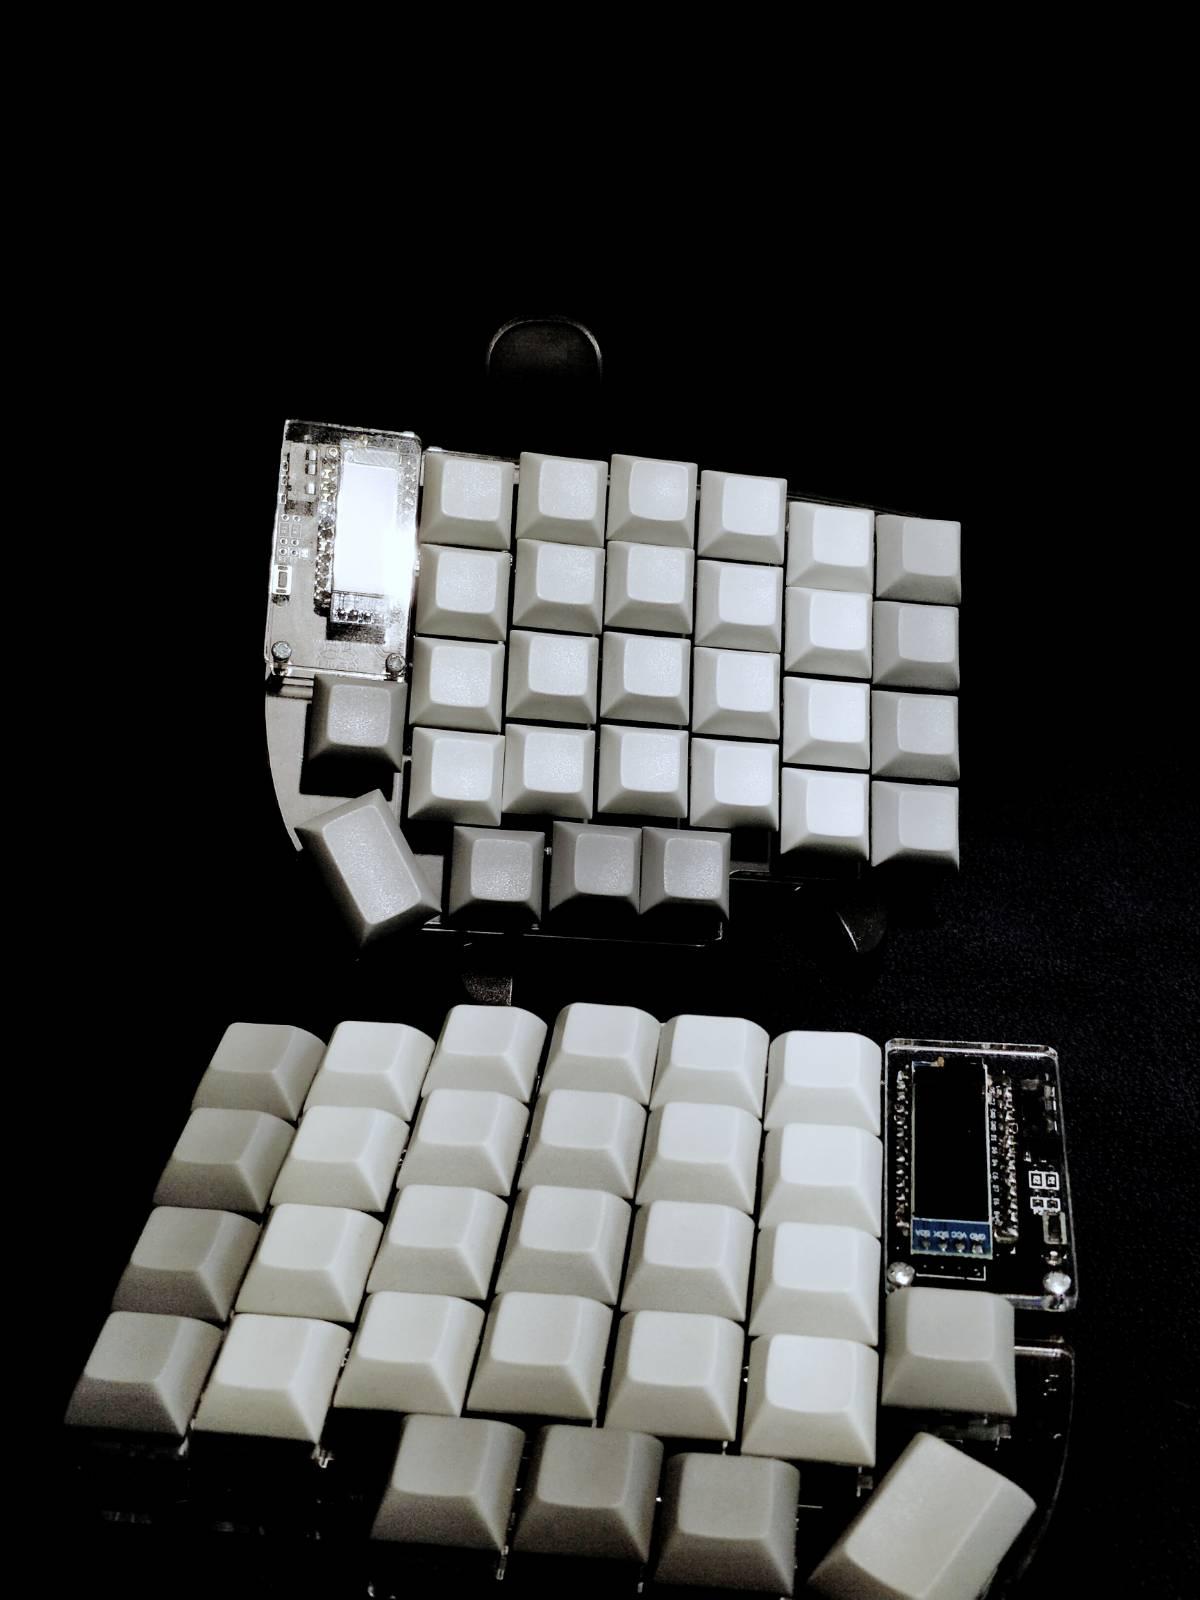
And then the keycaps! I ordered a blank keycap set colored with two greys.
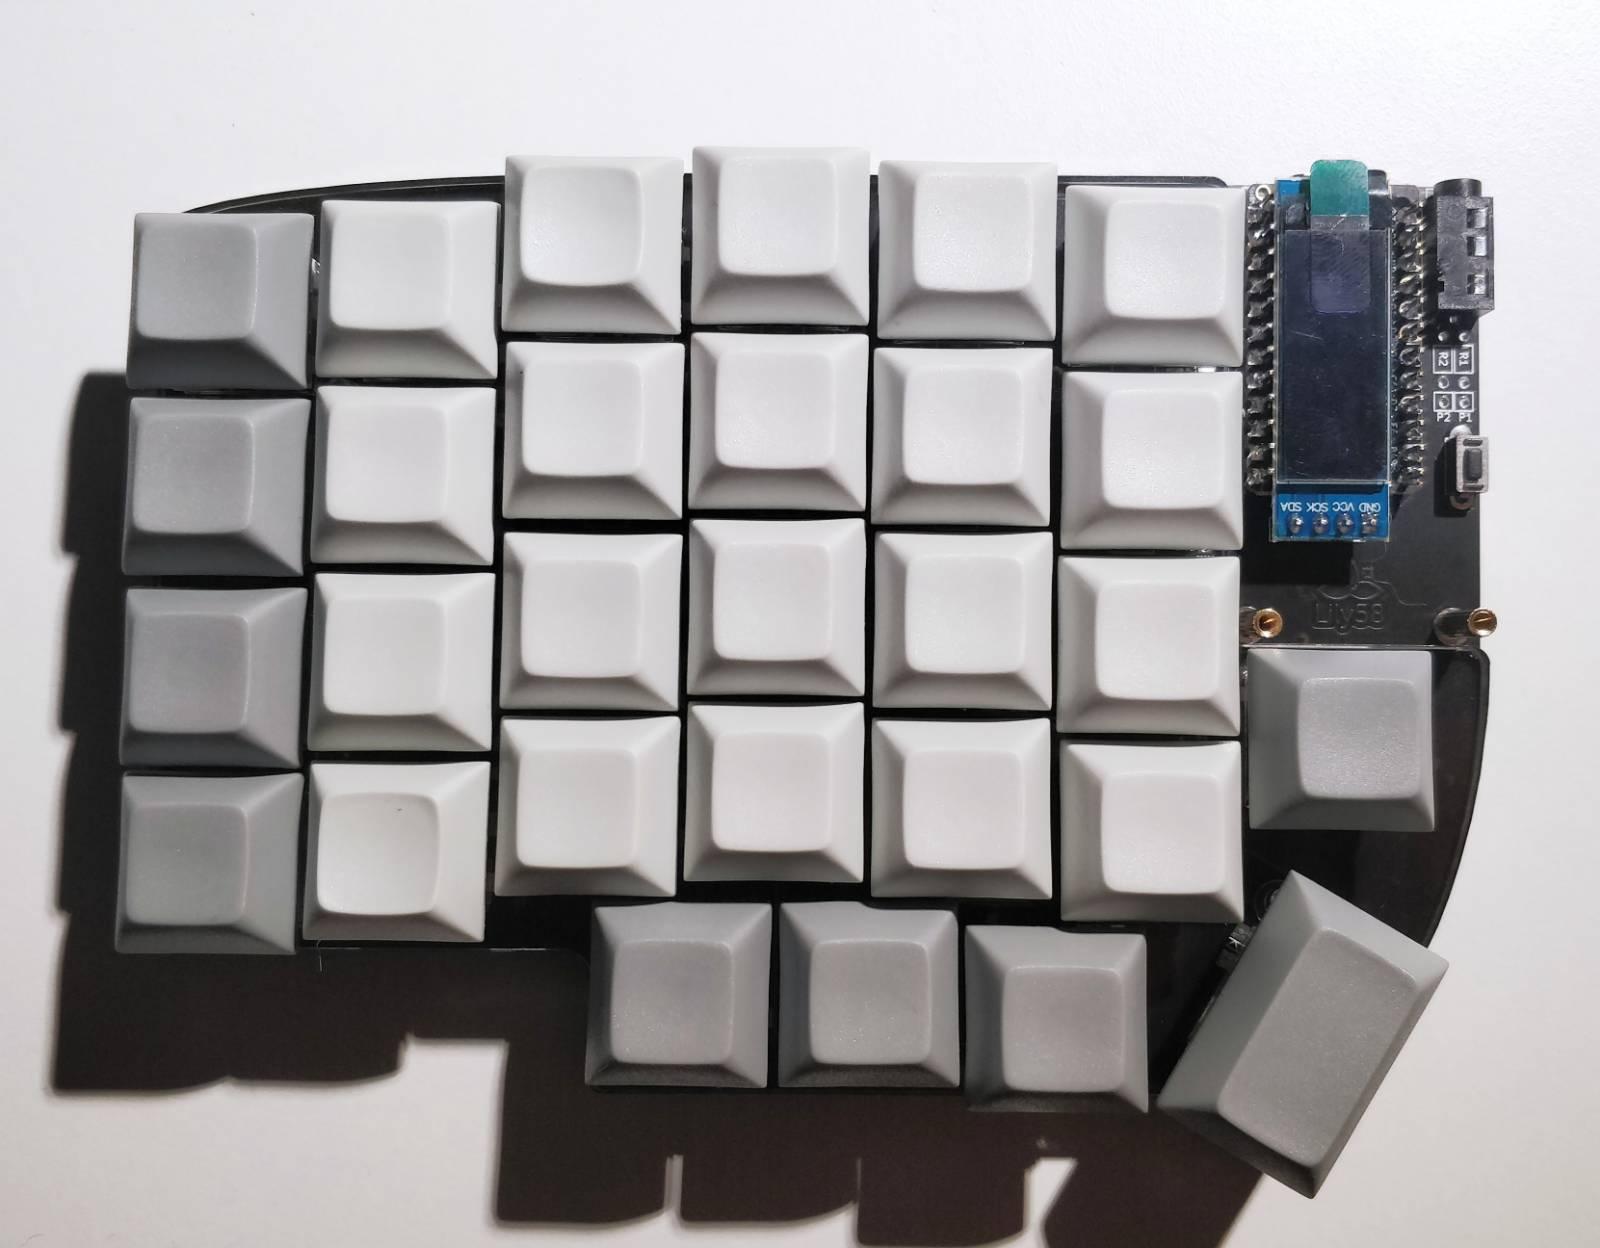
Then I had to just screw the case to its place and build the other half of the keyboard. The second half was much quicker and easier, as I knew the drill. There weren’t even any moments of despair this time 👀
 Hurray!
Software
Nervousness, tuning and problems didn’t stop after successfully building both halves. The microcontroller needs a software to function. Thankfully I didn’t have to do that myself, as the open source project QMK directly supports Lily58 keyboards. I forked the repository and configured dvorak with nordic characters åäö to the C source file. The layout is available here.
When I tried to flash the microcontroller following the guide, my computer didn’t recognise it. I tried another computer only to repeat the same issue. I pondered the situation with the Duck for a while and found a solution here. Although my controller of choice, the Elite-C, claims to be compatible with the Pro Micro, they have a different bootloader. Therefore I had to define the type of the bootloader of the Elite-C to the source code. After this fix flashing the microcontroller was smooth.
My keyboard has two special keys that regular keyboards lack: Lower and Raise. They work quite similarly as the better known Shift and AltGr, that can be held to alter the meaning of regular keys. Lily58 does not have a dedicated function key row, and the top row contains number keys instead (this could naturally be changed—everything is configurable). I use function keys all the time, for example F5 and F6 when browsing the web. In Lily58, the top row turns into a function row, when the Lower key is held. Likewise the arrow keys can be found on the home row of the right half when holding Raise. Extra layers enable great possibilities, as even though there are less physical keys compared to regular keyboards, it’s effortless to access very big amount of keys by utilising layers. As an example I’ve defined a macro that sends the Ctrl + Alt + Delete key combo that’s sometimes required in Windows. I just need to use one hand to activate it with two keys. Many more layers could be used, but for now Raise and Lower have been enough. I’ve been thinking about adding for example some of my most used emojis to one extra layer, or I could even have a complete layer for them.
The new order of the desktop
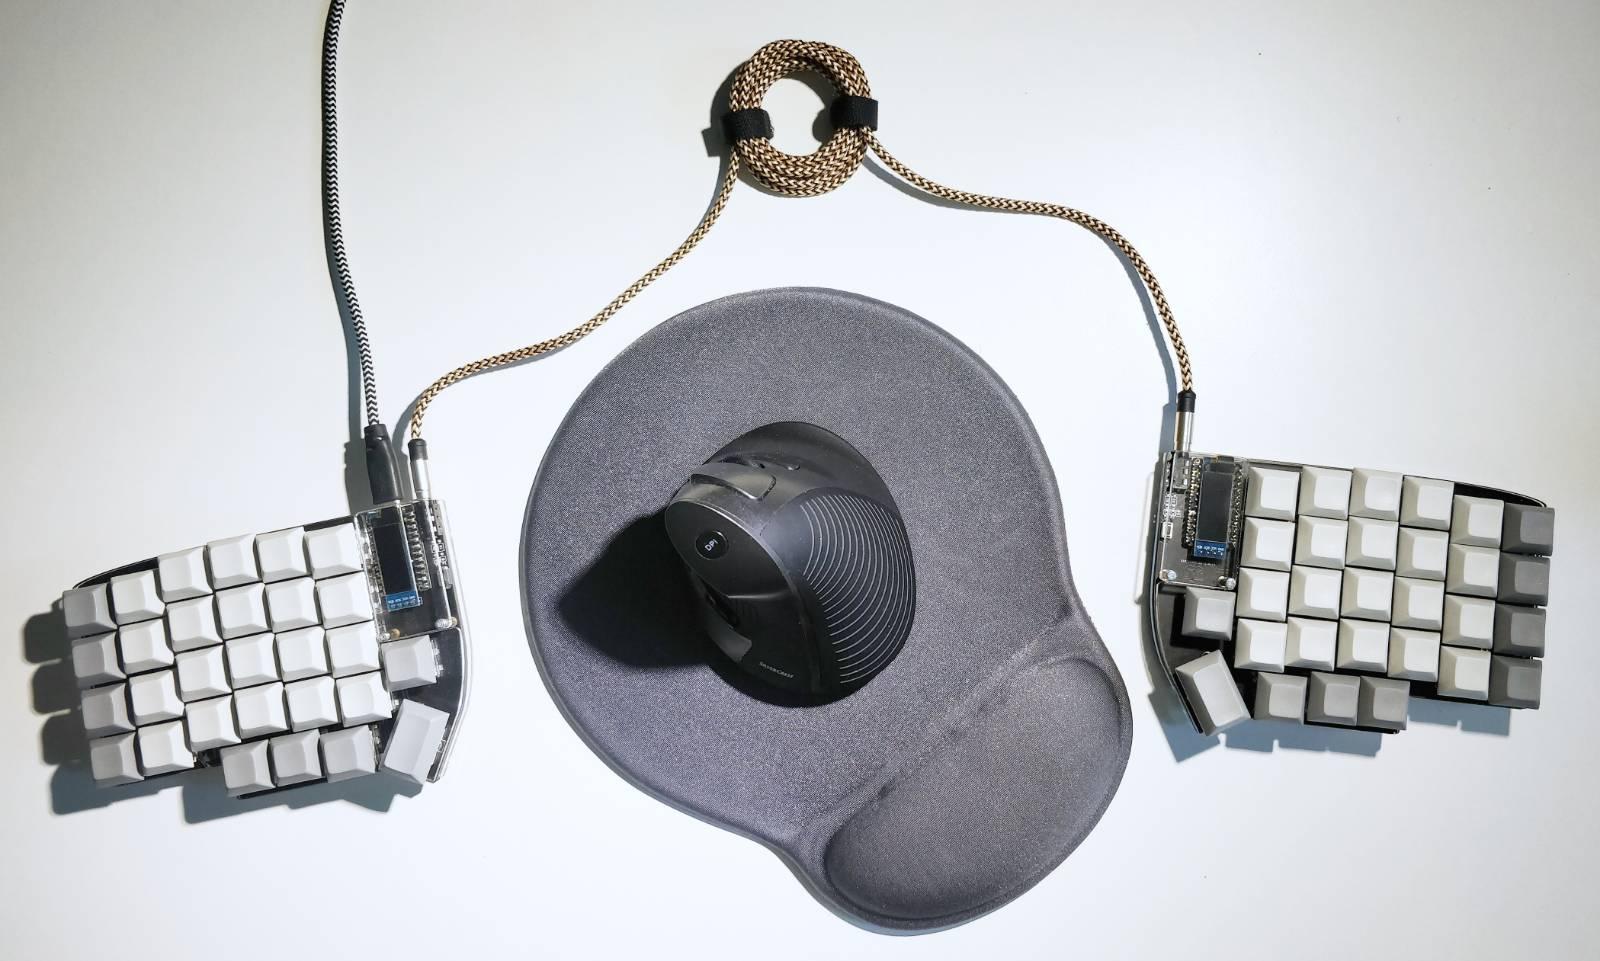
The split design of the keyboard brings new possibilities to the order of the desktop. Working on my laptop looks something like this:

When using an external display, a mouse can be placed between the halves:
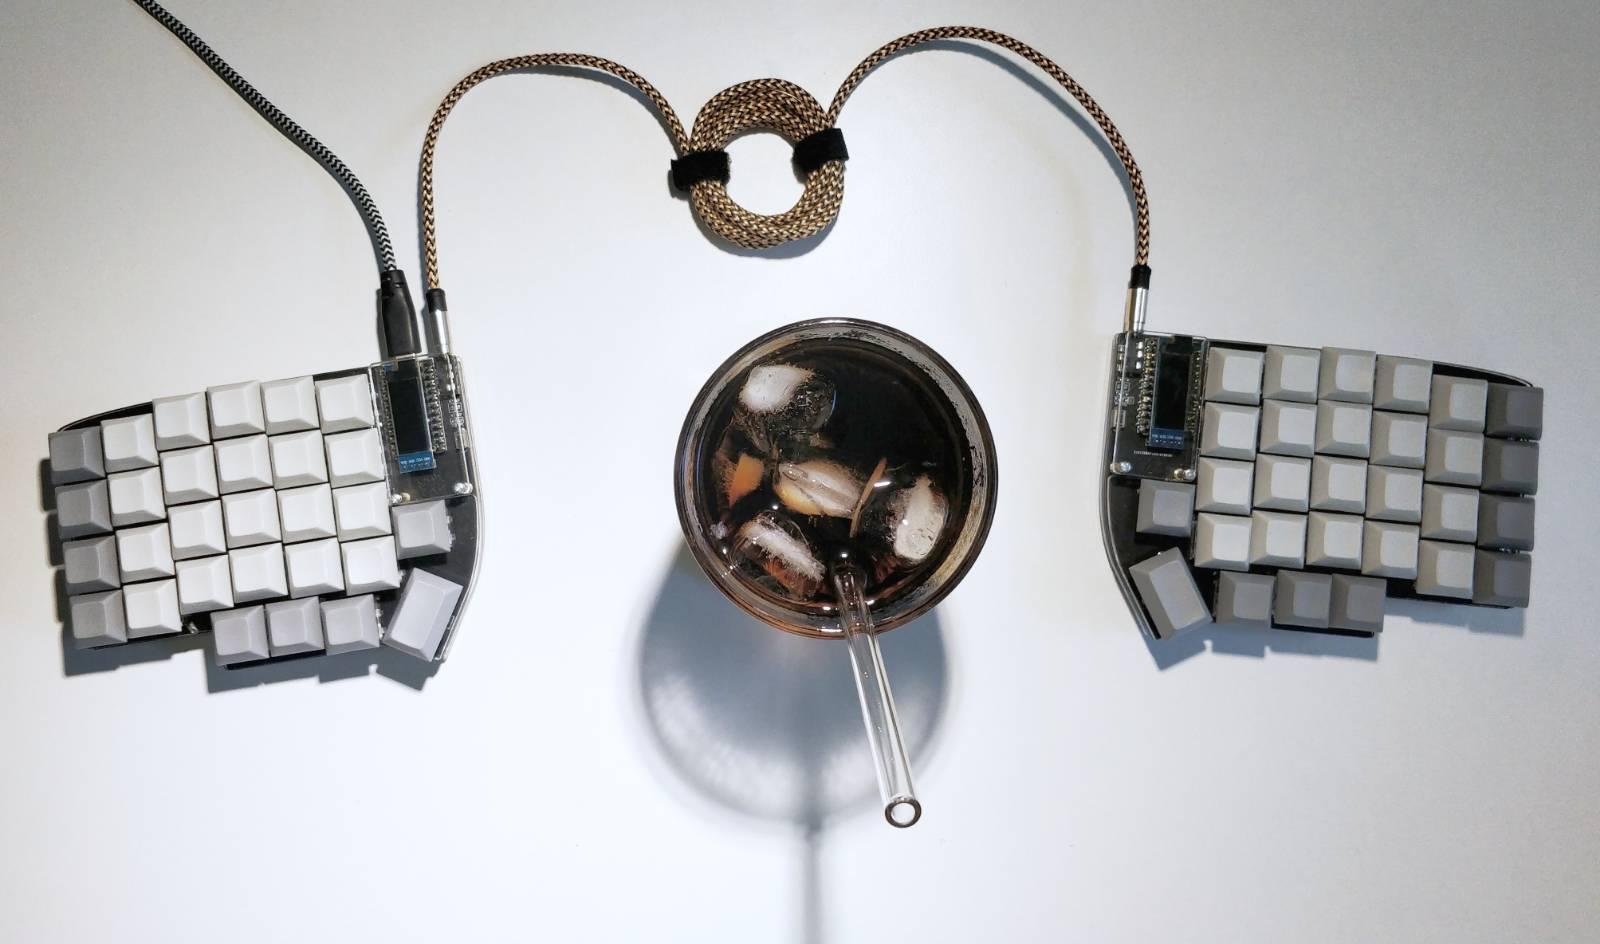
Or instead of a mouse something else completely:
Known issues
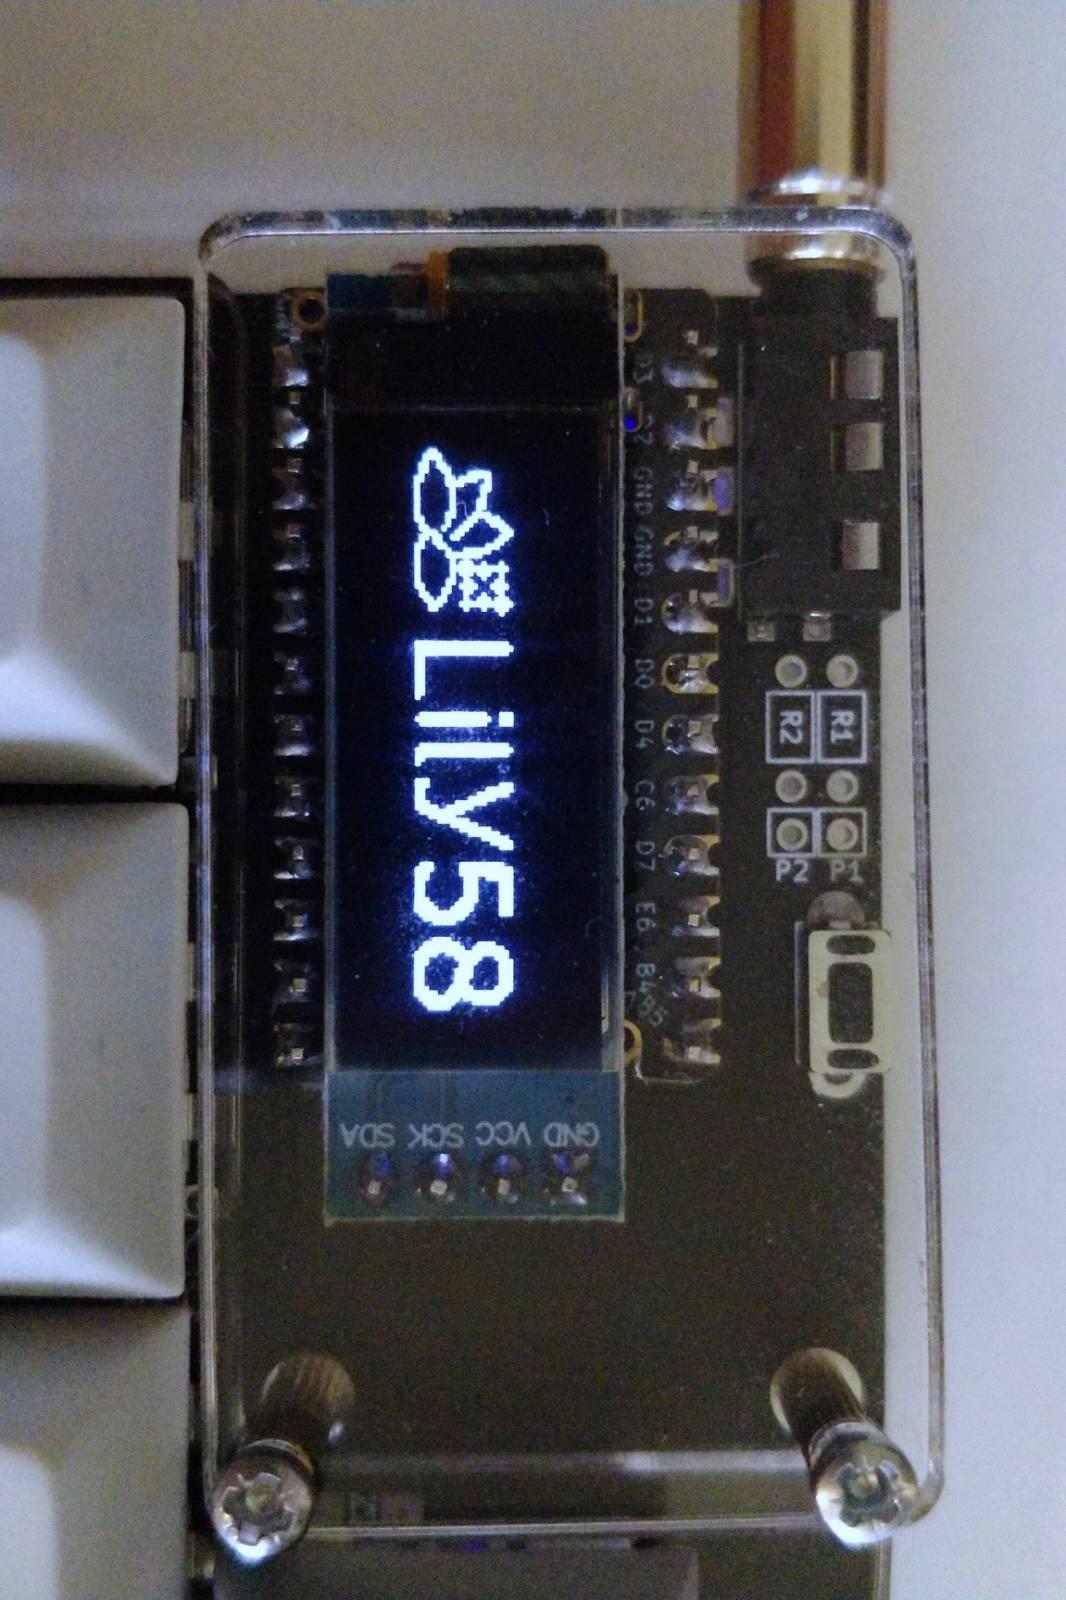
The display of the right half does not work.
By default it would show the name and the logo of the keyboard, so I really don’t have much pressure to fix it.
I could try to fix the issue by making sure that the microcontroller is properly connected and, if needed, I could wire the display manually directly from the controller.
Right after building the keyboard I noticed that one key on the left half didn’t work at all. Actually a whole row of keys was out of order, but that was easily fixed by properly soldering the controller to the PCB. However, it didn’t fix the one key, so I resoldered the diode and socket of that key. However, I managed to remove the connector of the socket, and couldn’t reconnect it. Luckily the PCB has support for two types of sockets, making it possible to wire the socket manually to the connectors of the other socket type. That works really well, but the wiring is a bit ugly. I don’t dare to post a picture of it here, but if you see me somewhere with my keyboard, I can show it if you really want to see it.
Some of the keys are not firmly installed. Each of them do stay in place even when turning the keyboard upside down, but still some of the keys can be removed a bit too easily. Maybe this is the downside of hotswappable switches? I don’t have a direct solution to this, and it’s a rather minor issue, that does not affect writing. I could try removing all of the switches and install them again following the build guide, as this problem didn’t exist in the beginning, but only after changing many of the switches.
Future plans
In addition to the previously mentioned fixes I’ve been planning to install a led strip as a back lighting. It wouldn’t be this traditional type of keyboard lighting, where the light glows through the keycaps, but the light would be directed downwards, lighting the table under the keyboard. This would be a completely needless feature, but certainly a fun addition, although RGB lights in computers and keyboards are maybe slightly clichéd. Fortunately installing lighting does not require me to have them always colourfully flashing—I’ve seen very stylish, restrained keyboard lightings!
Another useless addition would be a buzzer, that can be made to play in many ways. I even tried this feature quickly by using jumper cables and a piezo buzzer that I found in my electronics box. I could get some sound, but it wasn’t just what I expected it to be. More investigation is required.
Sound and light features, like everything else, is naturally completely configurable, and if I started to regret installing something, I could even remove them completely. The ability to configure is important, because I can save the battery of my laptop by turning off the lights, but could easily light the keyboard up again while charging the laptop.
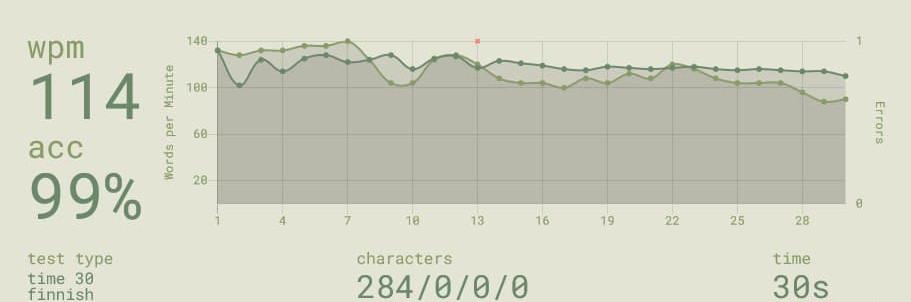
Video: keyboard sound and typing exercise
The video features me taking a typing test at Monkeytype. In the test I type as many given Finnish words as possible in 30 seconds. I used both halves for typing, even though the other half doesn’t show well. I recorded the typing sounds with an inexpensive dynamic instrument microphone, part of which can be seen in the video.
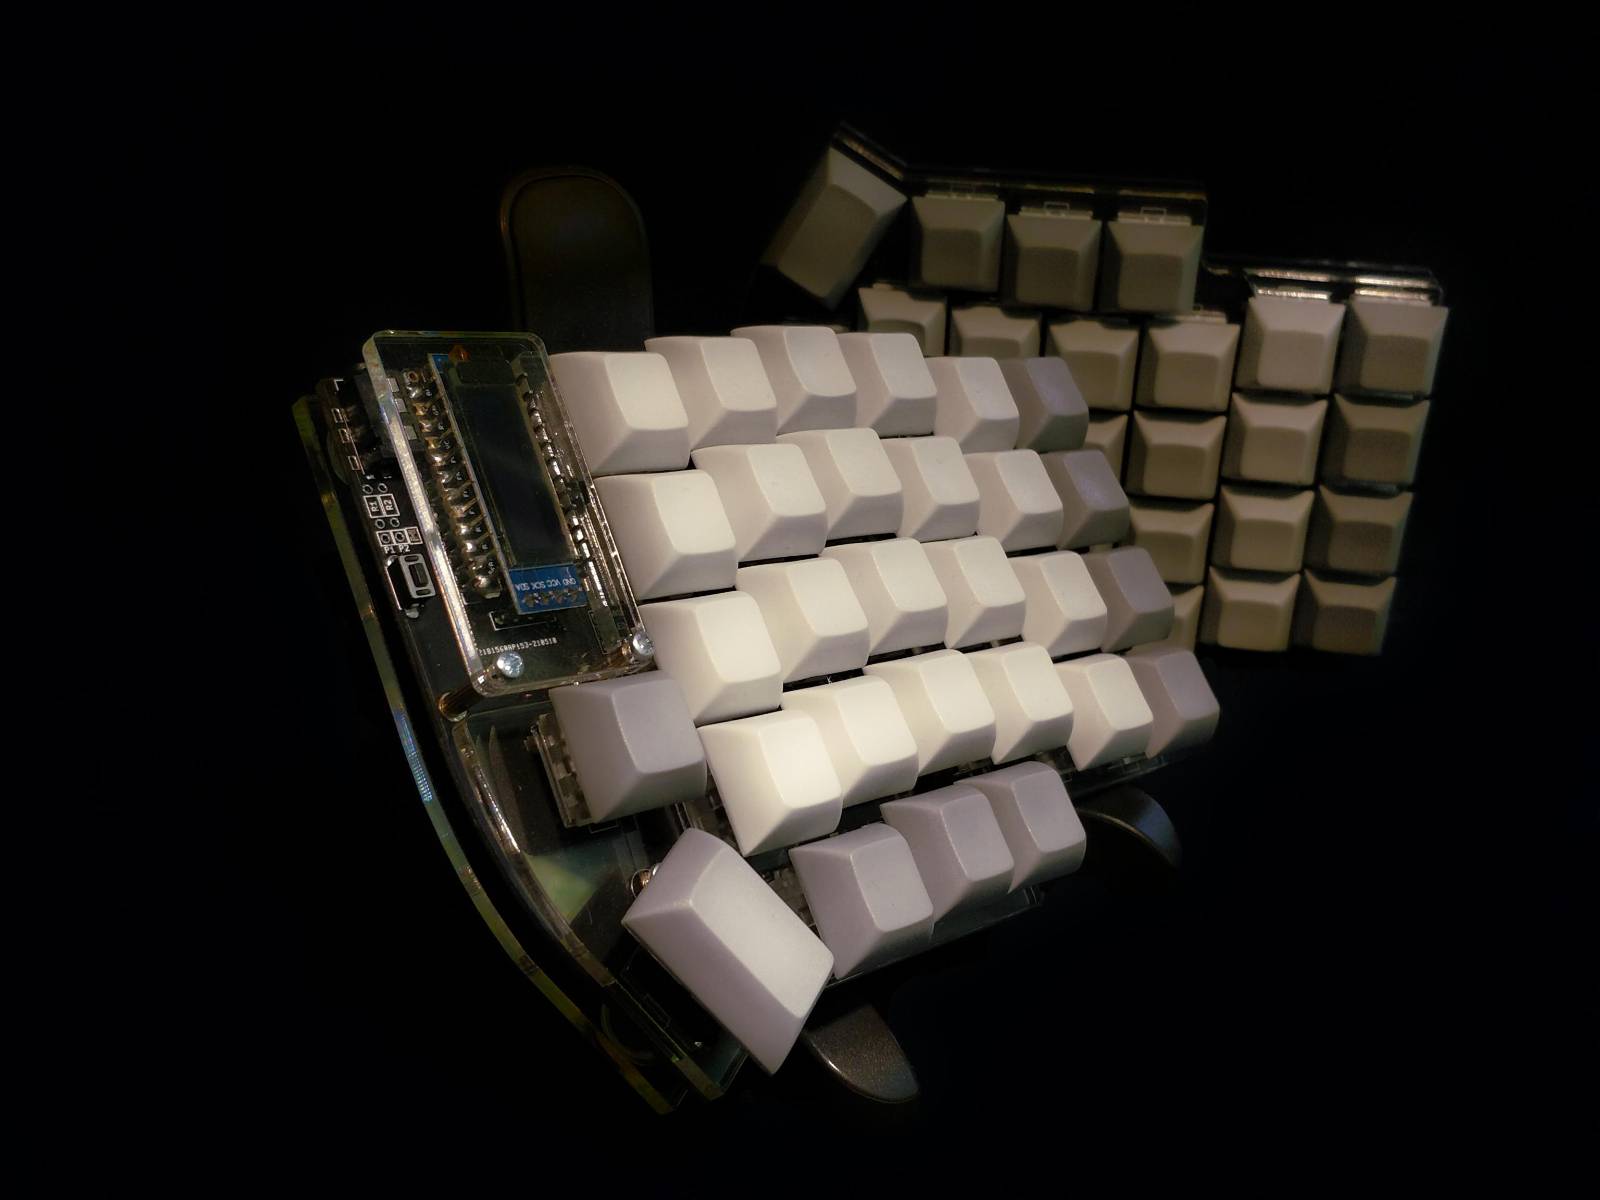
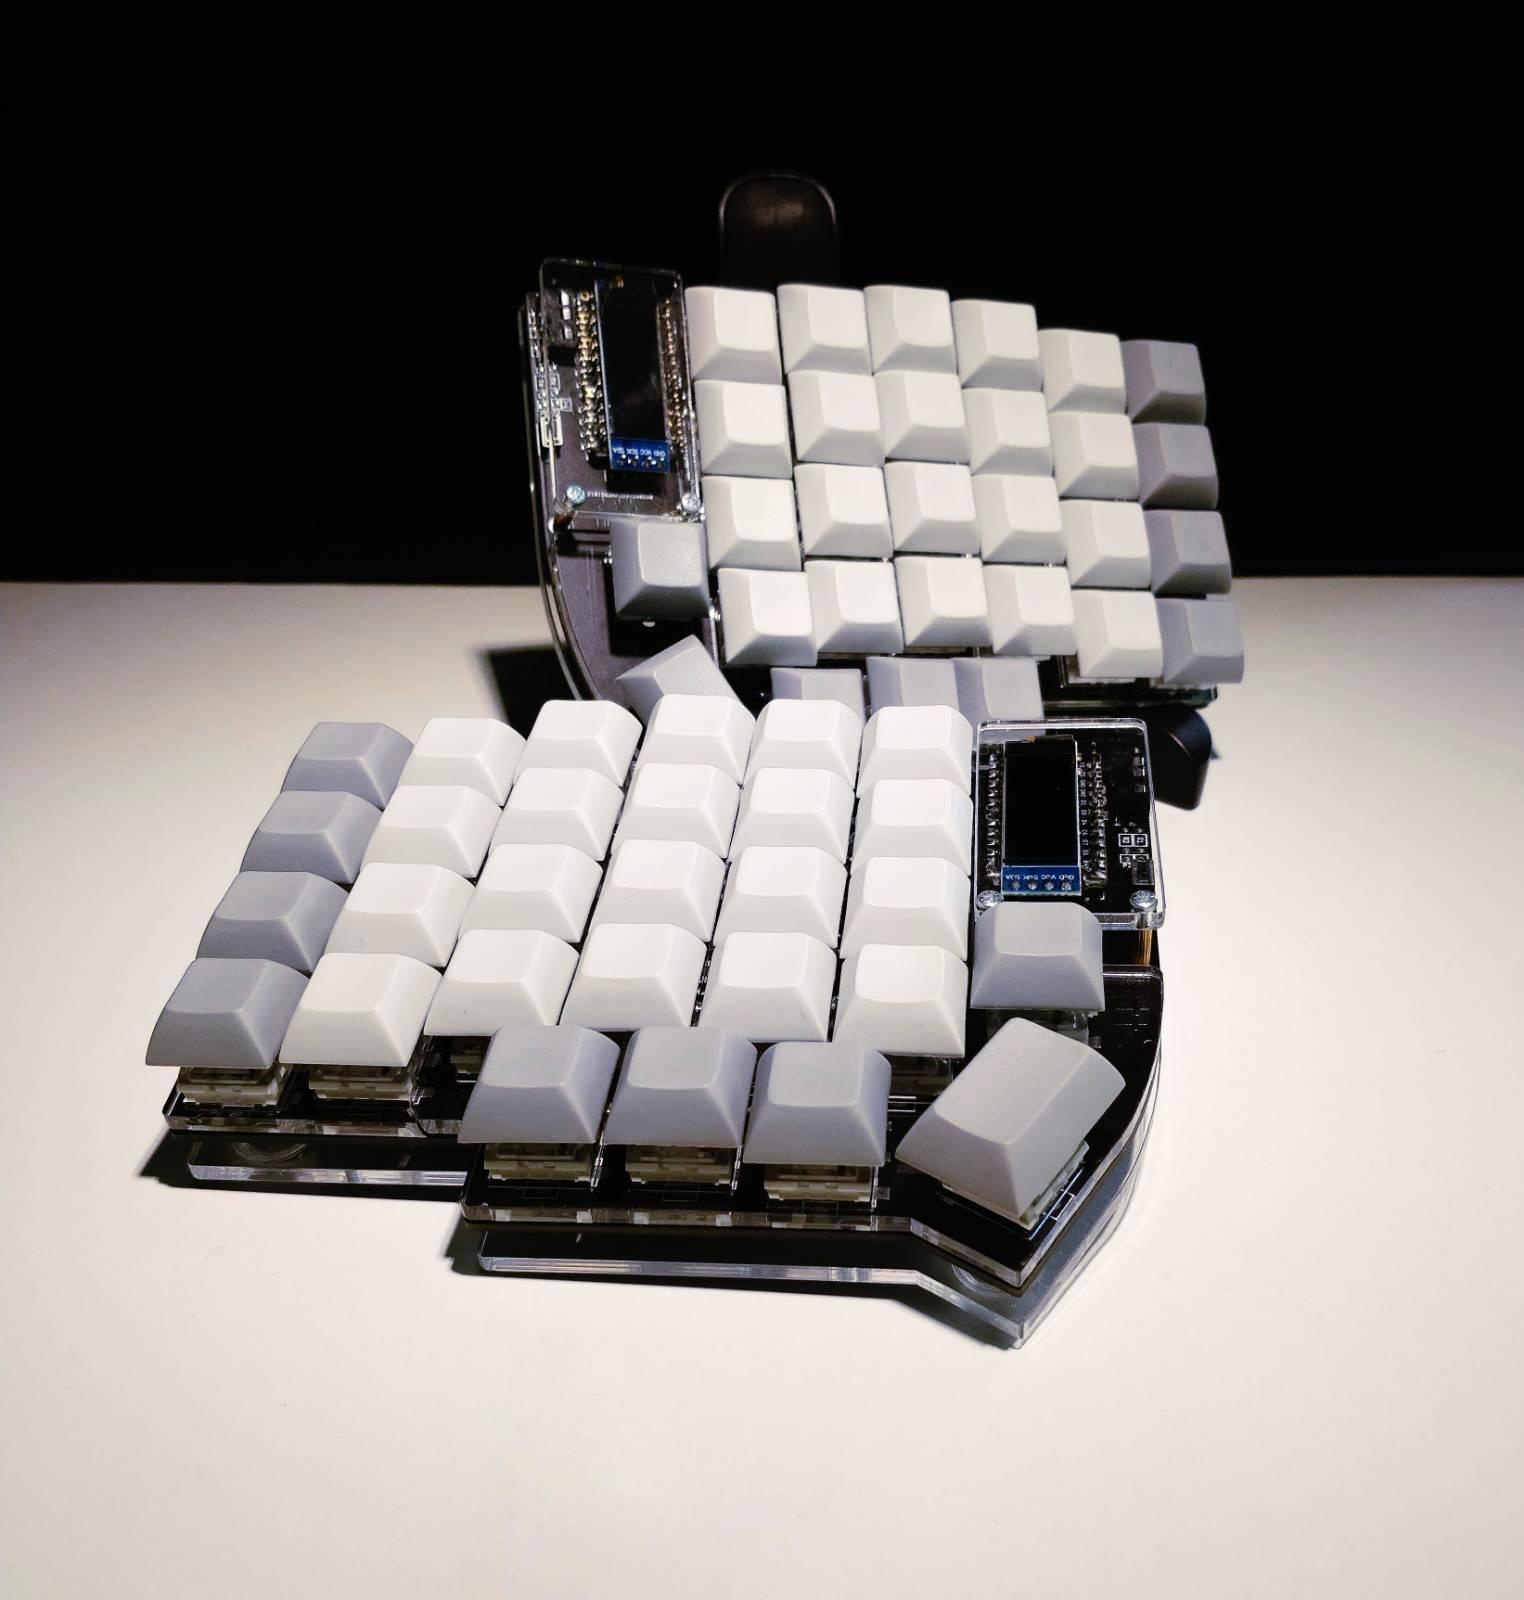
Glamour shots
Final thoughts
I’ve had a few stumbling blocks, but nothing fatal. I am extremely happy with my new keyboard, and building it was a great experience, certainly boosting my soldering self-esteem. The software of the keyboard can be modified indefinitely with the QMK firmware tool, and hardware can be modified as well. If something does not feel right, the chances are it can be changed. Learning to use a new type of keyboard has made me analyse my typing style and has helped me to improve it.
A downside is that after starting to use Lily58, I lost the ability to type on my laptop keyboard, as the keys are aligned a bit differently and I kept hitting wrong keys—just like I did with Lily58 in the beginning. I could for sure train myself to use both keyboards fluently, but currently I’ve just switched my laptop keyboard from dvorak to qwerty, while using dvorak on Lily58. This is a good solution for now, as I’ve configured Lily so that it presumes that the computer is set to Finnish qwerty. This way I can get my familiar dvorak layout in any computer, if I have my keyboard with me.
I’ve used my new Lily58 whenever possible, and typing on it is most pleasant. It goes without saying that I’ve written this blog post completely on Lily58. I’ve noticed that there’s at least some truth in the ergonomics claims, as I feel like my hands can be in a natural position when typing. Customisability has been really useful, and it’s easy to experiment with new features. I type a lot daily: my studies, job and free time involve plenty of writing. Therefore I believe that typing should feel cosy. I didn’t know much about keyboards before this project, but I learned a lot. Although I hope and believe that my Lily58 will serve me for a long time, I would gladly build another keyboard.
And it’s always good that one has hobbies.
Did you like this post?
I'll announce new posts in the following channels:
See my blog's front page to read my other posts.
You can reach me on Mastodon: @sampo@hachyderm.io. I'd love to hear from you!