openSUSE post-installation setup
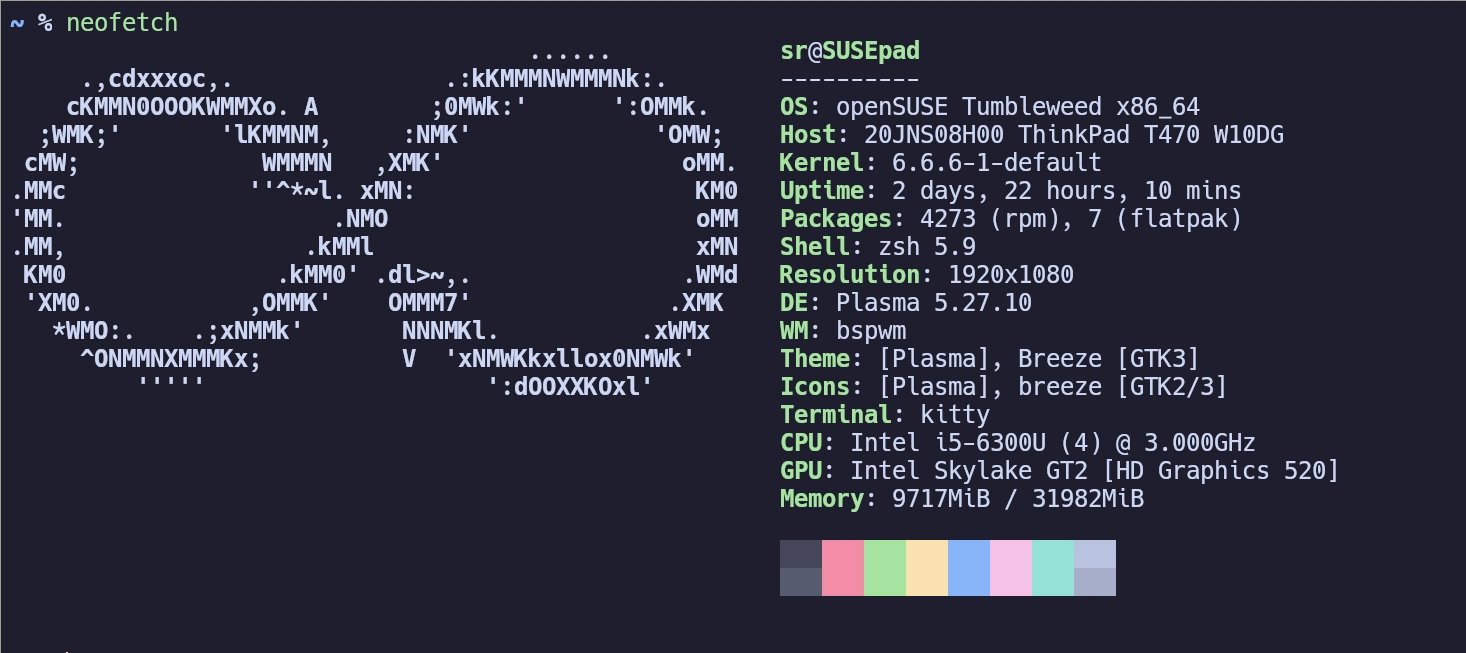
Last year, I published a post about installing openSUSE on my Thinkpad T470.
The laptop, openSUSE, and I have had a lovely journey since then!
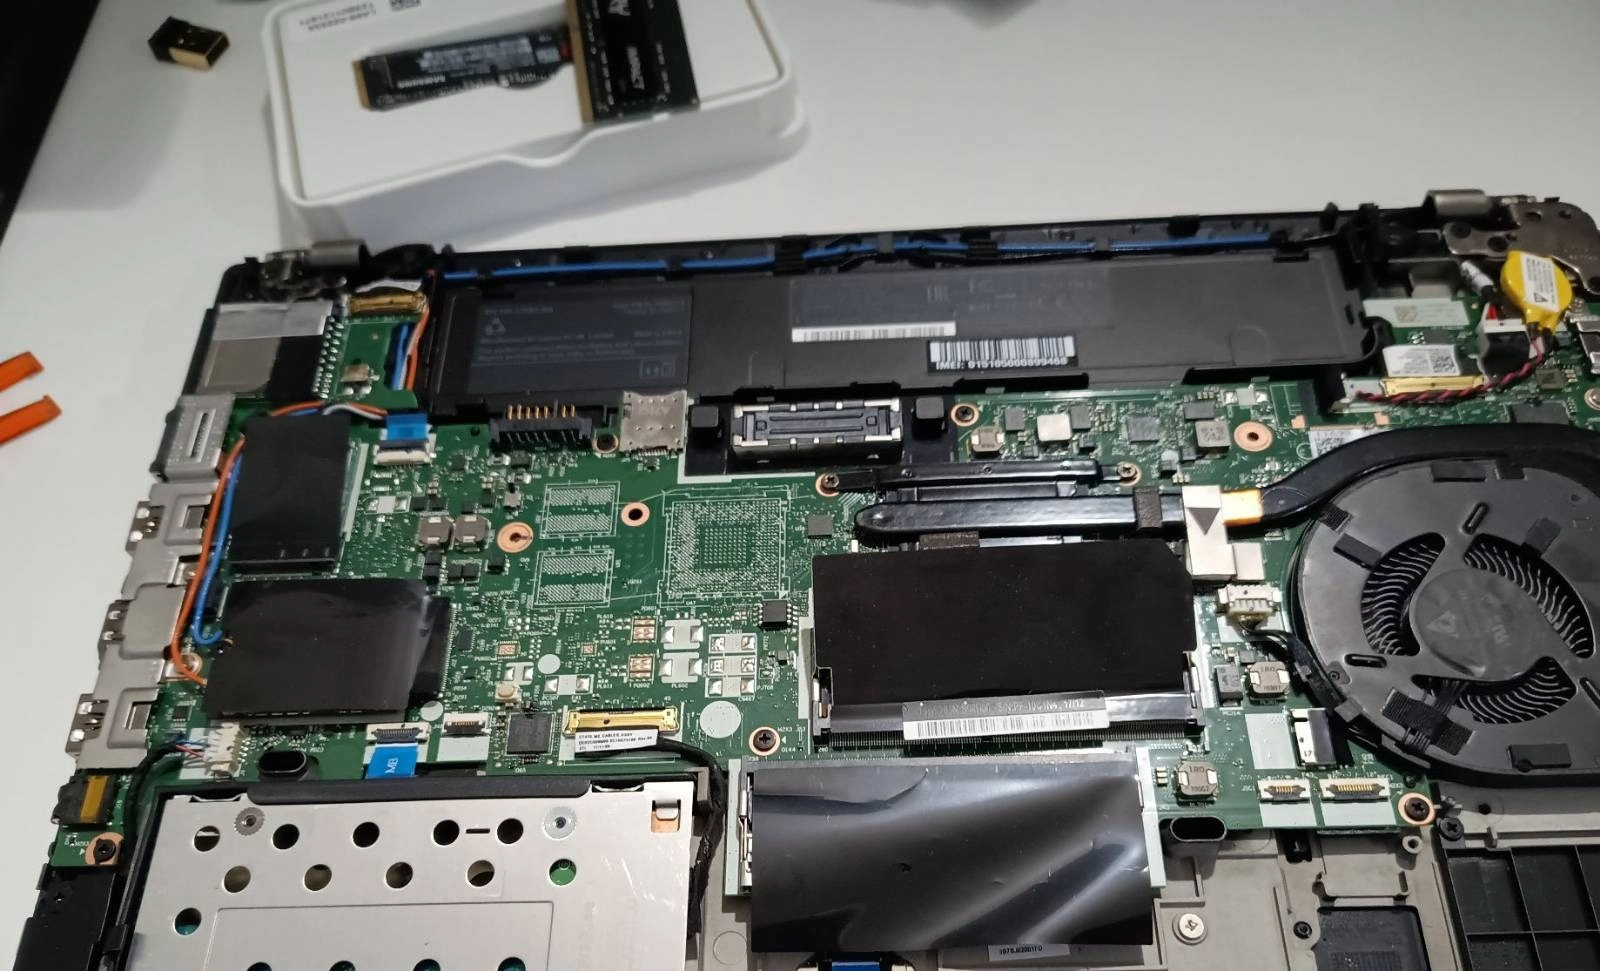
Recently, I got some upgrades for the T470: a new 16 GB RAM stick to max out memory and a 1 TB SSD to replace the old, cramped 256 GB SSD.
Instead of seeing what happens if I try to dd the contents of the old disk to the new one, I decided to re-install openSUSE and copy the contents of the home directory.
Since I referenced the previous post during the setup, I decided to write a more straightforward, updated guide. I can then reference this the next time!
Improvements since last time
- Disk encryption passphrase only needs to be entered once. No workaround is needed anymore!
- I created the swap partition during installation to avoid the hassle afterward.
- No need to configure KWallet separately. It seems that
pam_kwalletwas installed by default.
Installation
I downloaded the latest openSUSE Tumbleweed installation ISO and flashed it to a USB stick with dd.
I naturally enabled full disk encryption during the installation, and after learning from my mistakes, I also configured an encrypted swap partition.
After installation
Configuring sudo
sudo groupadd sudo
sudo usermod -a -G sudo sr
sudo visudo
Comment out the following lines:
# Defaults targetpw     # ask for the password of the target user i.e. root
# ALL   ALL=(ALL) ALL   # WARNING! Only use this together with 'Defaults targetpw'!
Add the following:
## Allow members of group `sudo` to execute any command (sr 2023-12-27)
%sudo ALL=(ALL:ALL) ALL
A reboot might be needed before the changes are fully applied.
Installing some packages
sudo zypper in bspwm curl deno gettext git htop kitty neovim picom screen tmux vim wget zip zsh
Setting the hostname
sudo hostnamectl set-hostname SUSEpad
Installing TeX Live
sudo zypper in texlive-extratools texlive-pdfx texlive-lastpage texlive-biber texlive-glossaries-english texlive-glossaries-finnish
These allow my tex report template and glossaries to compile.
Restoring the backups with Borg
I’ve used Borg to back up my home directory to an encrypted external drive.
# install Borg
sudo zypper in borgbackup borgbackup-zsh-completion

# extract to the current directory
# consider something like `mkdir ~/borg-extract && cd !$` before extracting
# make sure to use the correct backup repository (SUSEpad_borgbackup) and archive (2023-12-27)
borg extract /run/media/sr/$DISK_ID/SUSEpad_borgbackup::2023-12-27
mv -f home/sr/* /home/sr/
mv -f home/sr/.* /home/sr/
Changing the default shell to the Z shell
chsh -s /bin/zsh
Setting up dotfiles
Install dotfiles (if they weren’t set up from the backups already):
bash <(curl -sL sampo.website/install-dotfiles.sh)
Launch zsh and update the dotfile repository’s submodules (Antigen and some Vim plugins) by running
zsh
dot submodule update
Setting up Neovim
Launch Neovim in “IDE mode” and sync plugins:
nide -c PackerSync
Setting up Docker
Install Docker and add sr to the docker group:
sudo zypper in yast2-docker docker docker-compose docker-zsh-completion
sudo usermod -a -G docker sr
Enable and start the Docker service:
sudo systemctl enable docker
sudo systemctl start docker
Reboot and then test that the hello-world container runs:
docker run hello-world
Configuring Plasma + bspwm
- Follow these instructions
- Log out and log in to Plasma (X11)
- If the login fails, log in to, e.g., a TTY or a Plasma session (Wayland) and delete / rename
~/.xinitrc - Configure the panel (size and location, add Global Menu from the stock widgets)
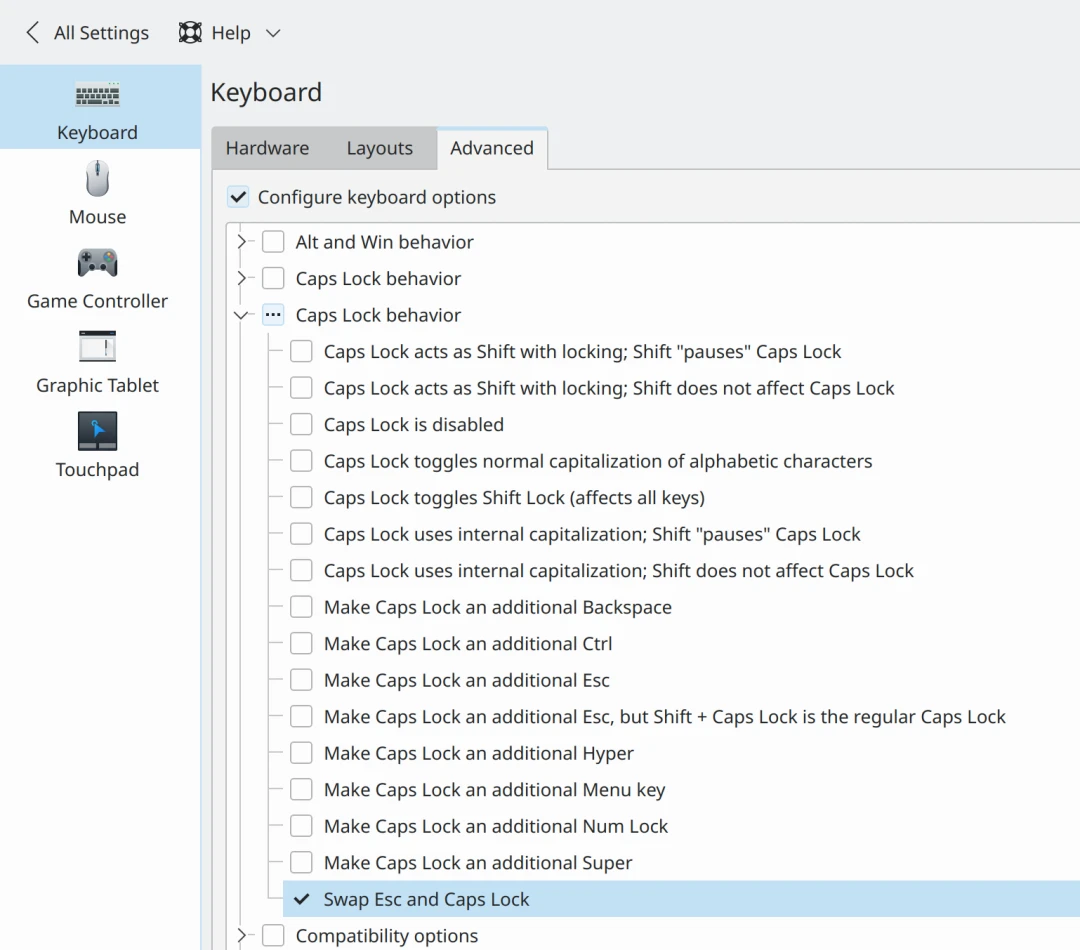
Swapping Caps Lock with Esc
Disabling “click to open” and set the Dolphin startup directory
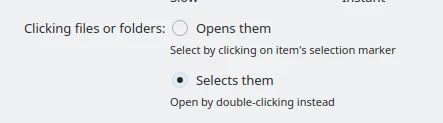
Set dolphin to open the home directory when started instead of the last locations:
Dolphin → Settings → Configure Dolphin… → Startup → Show on startup → /home/sr
Setting up Syncthing
Installation
sudo zypper in syncthing
Set up autostart
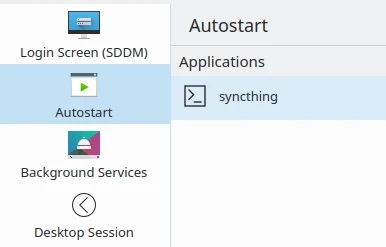
/usr/bin/syncthing
Configuring
- Start Syncthing (run
syncthing) - Navigate to http://localhost:8384
- Set up a username + password authentication for the web GUI
- Configure devices and folders
Setting a battery charge limit
- Right-click on the battery icon in the panel
- Select “Configure Energy Saving…”
- Select “Advanced Power Settings”
- Set the charge limit and apply changes
Installing software outside the default repositories
Once again, I used the “1-click install” of the experimental network:im:signal package for Tumbleweed.
Some tools like DBeaver and MuseScore are available as Flatpaks on Flathub:
flatpak install io.dbeaver.DBeaverCommunity org.musescore.MuseScore
Some users may also consider installing additional proprietary multimedia codecs from the Packman Essentials repository (more information, guide). Do your research and use your best judgment since Packman repositories are not a part of openSUSE.
Improvement suggestions
There’s still some clicking around when setting up the Plasma desktop environment.
I bet such configuration could be stored as a dotfile to avoid the need for manual configuration, but I haven’t looked into it yet.
Additionally, much of the setup could be automated with a script.
However, doing it right is tricky since the setup process might differ between installs, for example, on another distribution or a newer version of Tumbleweed.
And I don’t need to do such setups that often anyway.
But there’s a lot of room for improvement in the install-dotfiles.sh script, and I think some of the steps mentioned here could be included for a more convenient setup.
That’s it! OpenSUSE Tumbleweed is an excellent rolling-release Linux distribution, so I’ll likely find use for these instructions in the future.
Did you like this post?
I'll announce new posts in the following channels:
See my blog's front page to read my other posts.
You can reach me on Mastodon: @sampo@hachyderm.io. I'd love to hear from you!