ThinkPad + openSUSE
I bought a new laptop and tried a new Linux distribution on it. In this blog post, I’ll first explain how I ended up in this situation and how my experience with a ThinkPad T470 and openSUSE has been this far. I’ll also share many details about how I use my computer, mainly for self-reference, but it’s available for anyone to get inspired. To be clear, I use a very customized system and love tweaking it. OpenSUSE and many other Linux distributions work just fine after installing them. I’ve decided to go on an adventure instead of following the easiest path.
UPDATE 2023-12-30: I installed openSUSE again and wrote a new post about it. It contains a list of solved issues I faced the first time and a more straightforward description of my post-installation configuration steps.
Table of contents
- Backstory
- Before the installation of openSUSE
- Installation
- After the installation
- Learning the very basics of the Zypper package manager
- Copying my old files from an encrypted external hard drive
- Installing some applications
- Installing software outside the official repositories
- Setting up my dotfiles
- Setting up Syncthing
- Configuring Plasma +
bspwm - Opening KWallet automatically
- Installing
texlive - Swapping CapsLock with Esc
- Disabling the “click to open” feature
- Setting the hostname
- Configuring
sudo - Setting up a swap file
- Setting a battery charge limit
- Issues faced
- Afterthoughts
Backstory
I’ve had issues with my ZenBook since I bought it in 2019. After running Debian testing on that for nine months, I still suffered from random freezes I didn’t have during my years with Kubuntu. I got accepted to participate in a hackathon in Amsterdam, so I needed a trustworthy laptop. I could have used my previous laptop, which has Ubuntu installed. It isn’t configured how I currently use my laptop, but it works reliably. Thus, I wanted to get my ZenBook working, and the hackathon provided a concrete deadline. I decided to try something other than Debian or its derivatives, giving openSUSE a chance. I also considered Arch, Fedora, and Mint (which, yes, is based on Ubuntu). And I already knew that even though Kubuntu can sometimes be slightly annoying (e.g., with snaps), it works or at least has worked on my ZenBook, so it’s always a good fallback option.
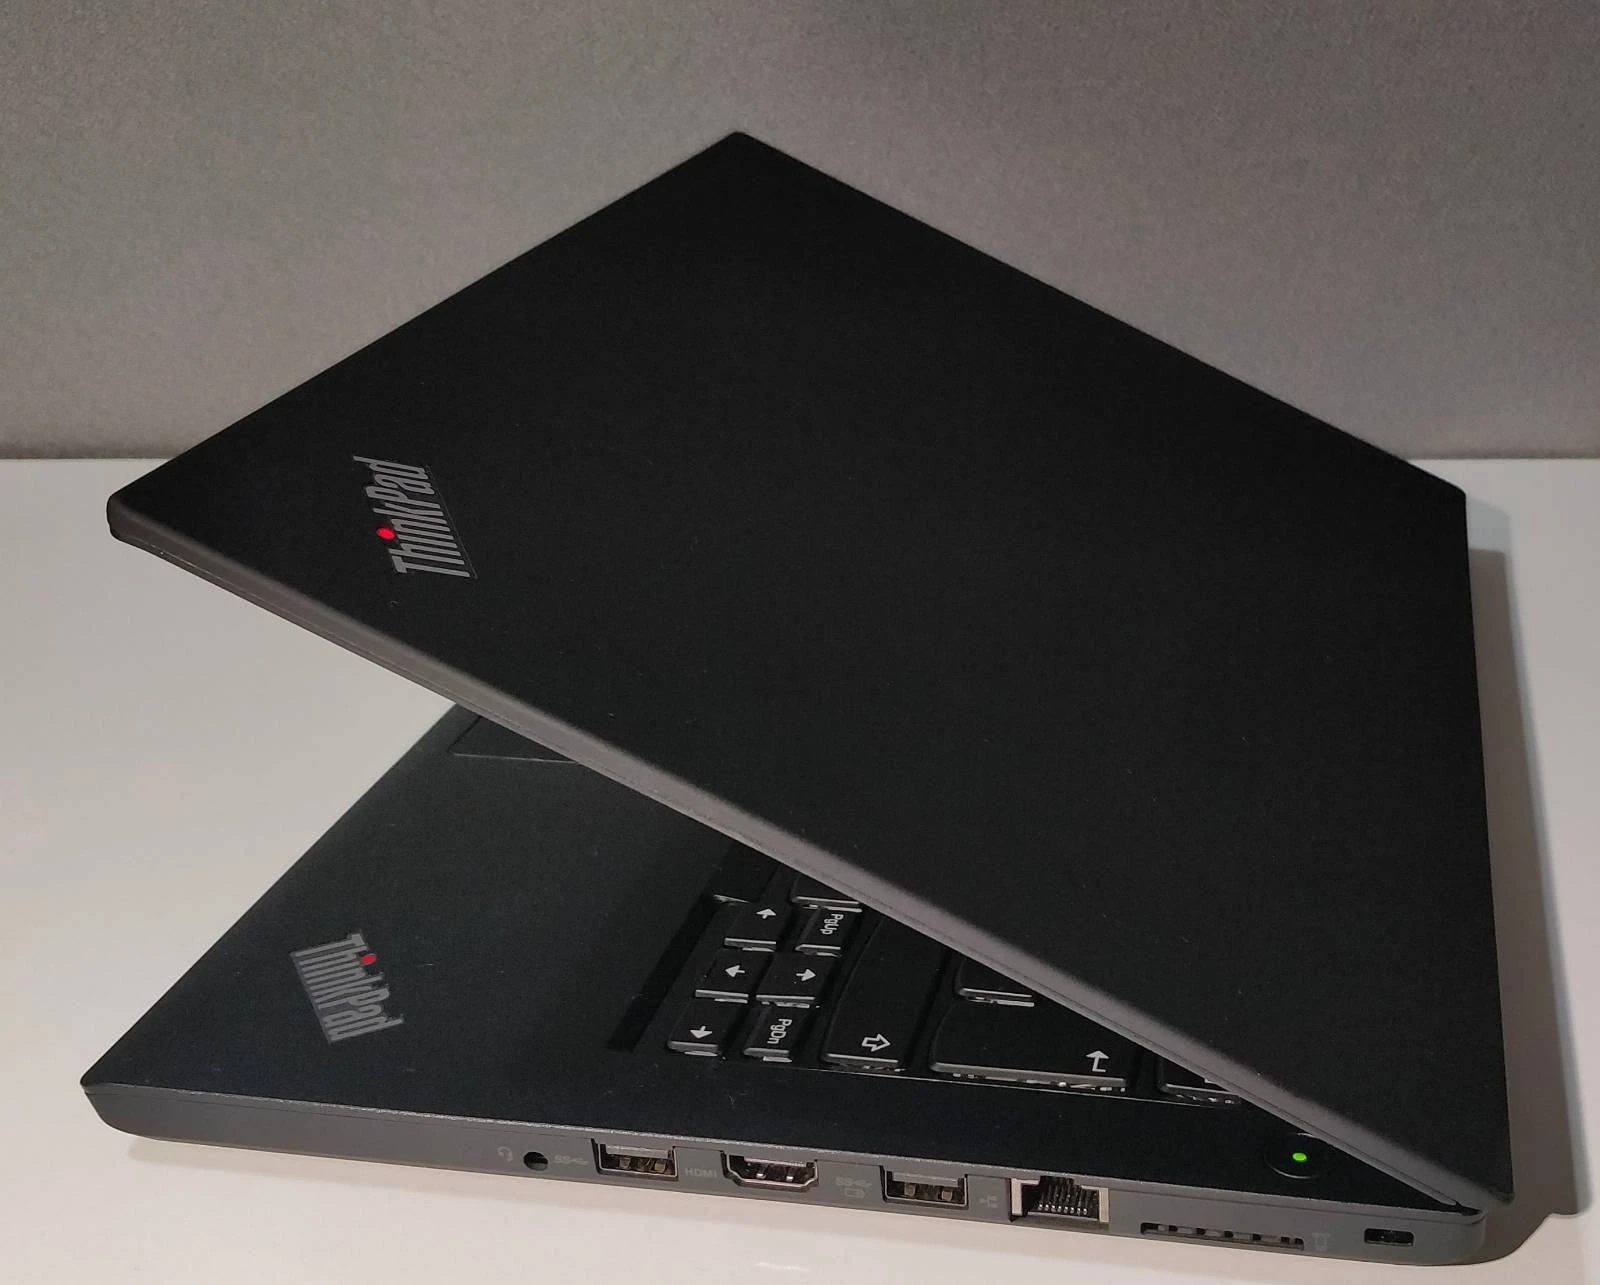
Long story short, I installed openSUSE on ZenBook, and it worked well initially. However, the freezes still occurred, and I started to look for a new laptop. I’ve used a Thinkpad X1 Carbon at work, and it’s fantastic. I explored the offerings of a few companies selling used company laptops in Finland and found some X1 Carbons and other Thinkpads. I decided to buy a used Thinkpad T470 for 509 euros, still unsure whether my ZenBook was as good as a paperweight or a good laptop for someone. The T470 looked as good as new, with little to no signs of use. Even the batteries were in excellent condition (81% and 85%; way better than my ZenBook’s)! It has lower specifications than my ZenBook; for example, it only has a 1080p display and only one USB-C port. The SSD is also smaller, and the processor isn’t better either. Both have 16 GB of memory, and both memory and disk are upgradeable in the T470. However, my usage is mostly very light. I often have just Firefox and a few terminals open. The Thinkpad is bigger and heavier than the ZenBook, but it still fits nicely in my backpack. Realizing that I could use the same USB-C devices as earlier, including charging the device and using external displays, finalized my purchase decision.
Before buying the Thinkpad T470, checked online that people are happily running Linux on that Thinkpad model, and even though I’ve never had a Thinkpad as my personal computer, I know they’re supposed to be good laptops. It’s also good that the hardware isn’t bleeding edge, as it has better chances of running Linux well. OpenSUSE seemed like an excellent option, and as it worked well with the ZenBook, I also decided to install it on the T470.
I chose the Tumbleweed edition of openSUSE, which is a rolling release distribution like Arch Linux. In rolling release distros, system updates upgrade all software to their newest available versions. On most Linux distributions, there are periodic upgrades, e.g., Ubuntu releases a new version every Spring and Fall and a long-term support release every two years. With Tumbleweed and other rolling release distros, there are no releases. The newest version of all software is used after each update. Rolling release distros provide less stability than other distros, as it’s not guaranteed that the new versions work properly independently and with each other. Thus, one should always reserve a peaceful time to run the system upgrade in case of issues after upgrading. However, as long as one updates periodically (like every week or month), there shouldn’t be a lot of issues. OpenSUSE also tries to test new software automatically to decrease the possibility of conflicts after updates. Additionally, I signed up for openSUSE Factory mailing list, as there will likely be a mail in case the upgrade breaks something.
Why did I select a rolling release distro?
I like to have the newest versions of software like Git, Firefox, Neovim, programming languages (even though nvm has been great with node), and even the Linux kernel in the hope of improving hardware support and performance.
Before the installation
I checked that Firefox has synced and backed up my home directory to an encrypted external hard drive.
I should have also checked that I don’t have non-pushed changes on my dotfiles. I’m sure I did, but likely nothing important. I could check these from the external drive; everything is backed up.
Installation
I flashed the network install image to a USB stick. The installation was smooth, and I left Windows installed just in case. I installed the KDE Plasma desktop environment, which I have used for a few years.
The system booted without issues, and I logged in to a fully working system. There are no problems with wifi, suspend, audio, or camera. Great!
After the installation
Learning the very basics of the Zypper package manager
OpenSUSE uses the zypper package manager.
Searching, installing, updating, and removing packages as well as updating repositories is simple and easy to learn as someone coming from the world of apt:
zypper search package
zypper install package
zypper dist-upgrade  # full system update on Tumbleweed
zypper remove package
zypper refresh
The commands also have shorter versions:
zypper se
zypper in
zypper dup
zypper rm
zypper ref
The most significant difference compared to apt is probably the last command, updating the repositories.
I would run apt update on Debian, but zypper update doesn’t update the repositories but packages!
I understand that zypper update shouldn’t be run on Tumbleweed, as zypper dist-upgrade should be used to upgrade packages.
Zypper feels like a proper package manager, although it feels a bit slow compared to apt (not to mention the blazing fast pacman).
However, this could be due to poorly chosen mirror servers – I’ve seen people recommending
Mirror sorcerer,
which claims to determine the fastest mirrors for a system.
I could start by checking what mirrors are geographically close to me.
Additionally, Zypper seems to install “recommended packages” eagerly.
That isn’t a big deal, and it’s likely configurable behavior.
I was just surprised when I saw Git GUI installed 😄
Copying my old files from an encrypted external hard drive
Many of my files aren’t on the cloud but are stored offline only. Happily, everything necessary easily fits the smallish SSD of my new T470.
Installing some applications
These are some applications I often install on a new Linux installation. List of terminal software I installed with Zypper:
- bat
- curl
- gettext (for dotfile installation script)
- git
- htop
- neovim
- screen
- tmux
- vim
- wget
- zsh
Some of these are included in the basic openSUSE installation, but it’s a list of handy software I will most likely install on a new system.
Less critical but nice-to-have programs that I’ve installed (or will install):
- audacity (audio editing)
- cheese (webcam)
- docker
- gimp (image manipulation)
- gparted (disk partitioning and formatting tool)
- inkscape (vector graphics)
- jq (JSON tool for the terminal)
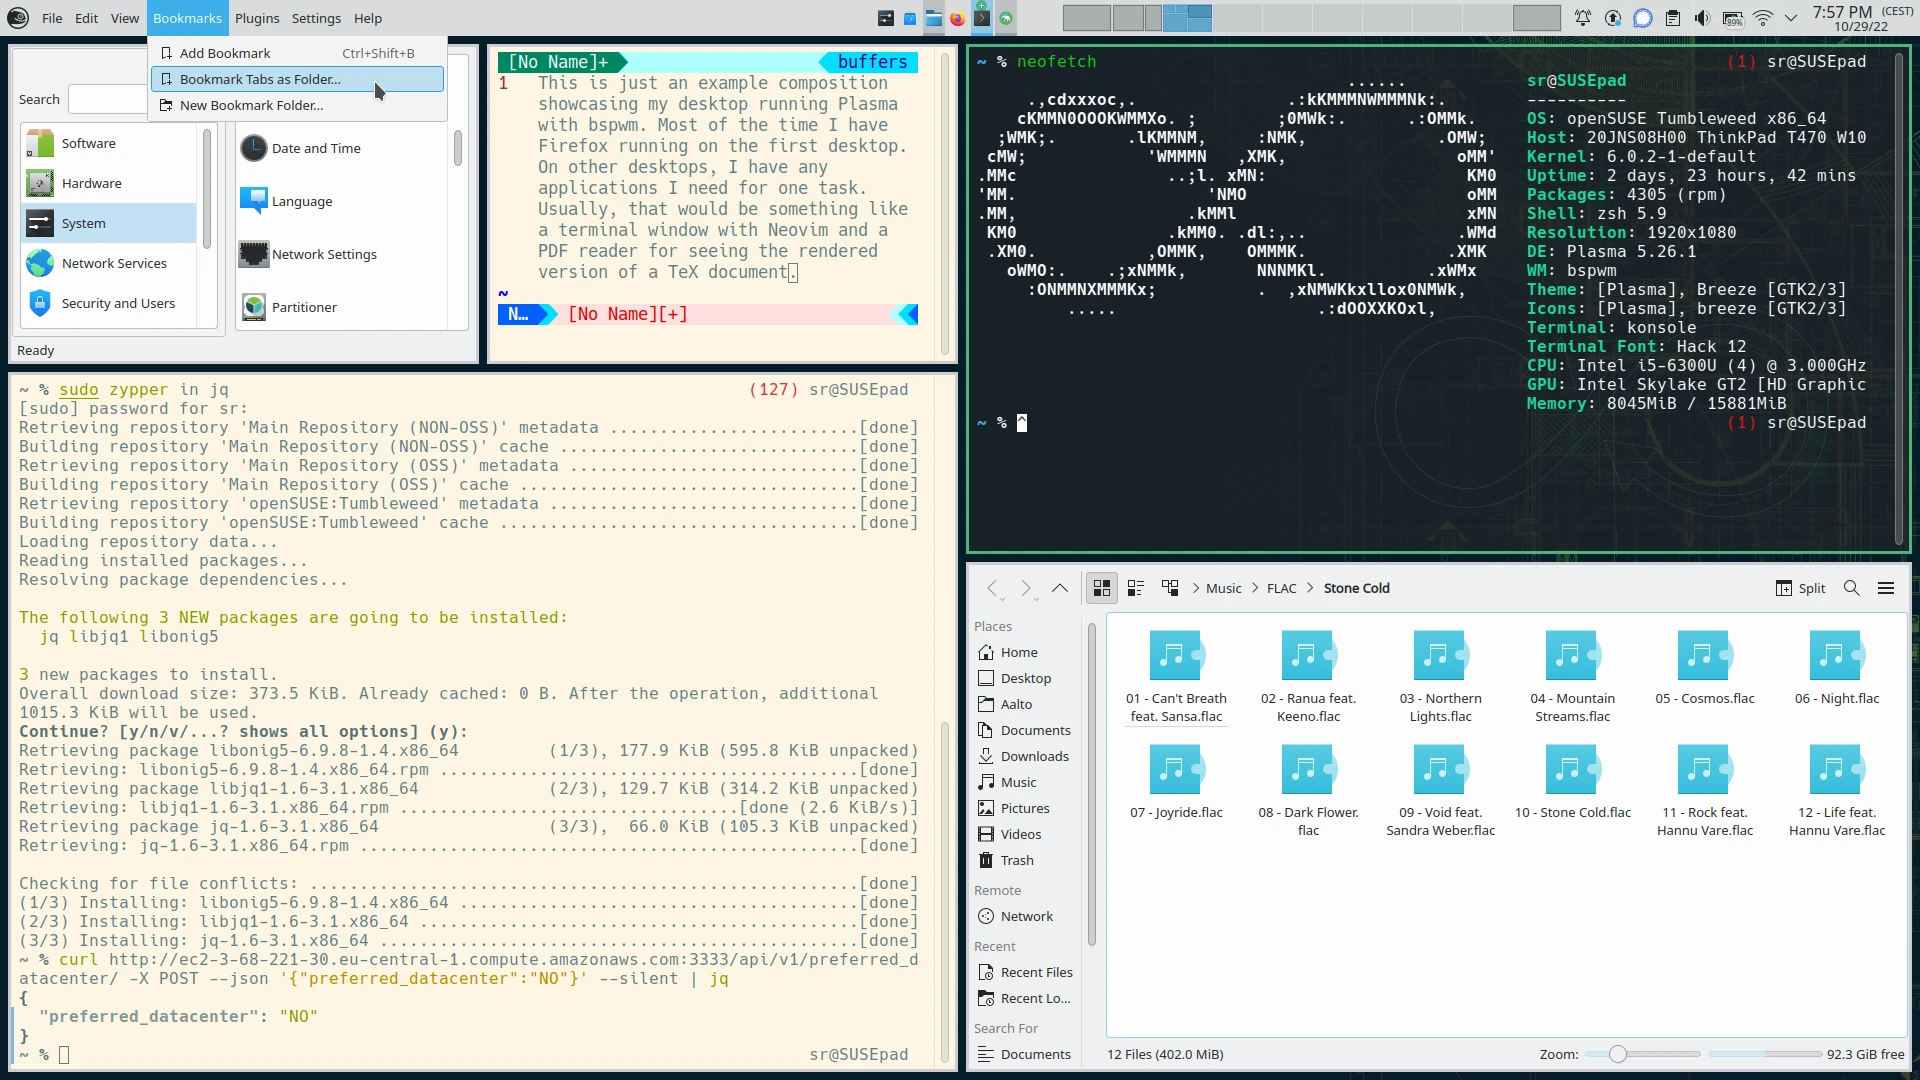
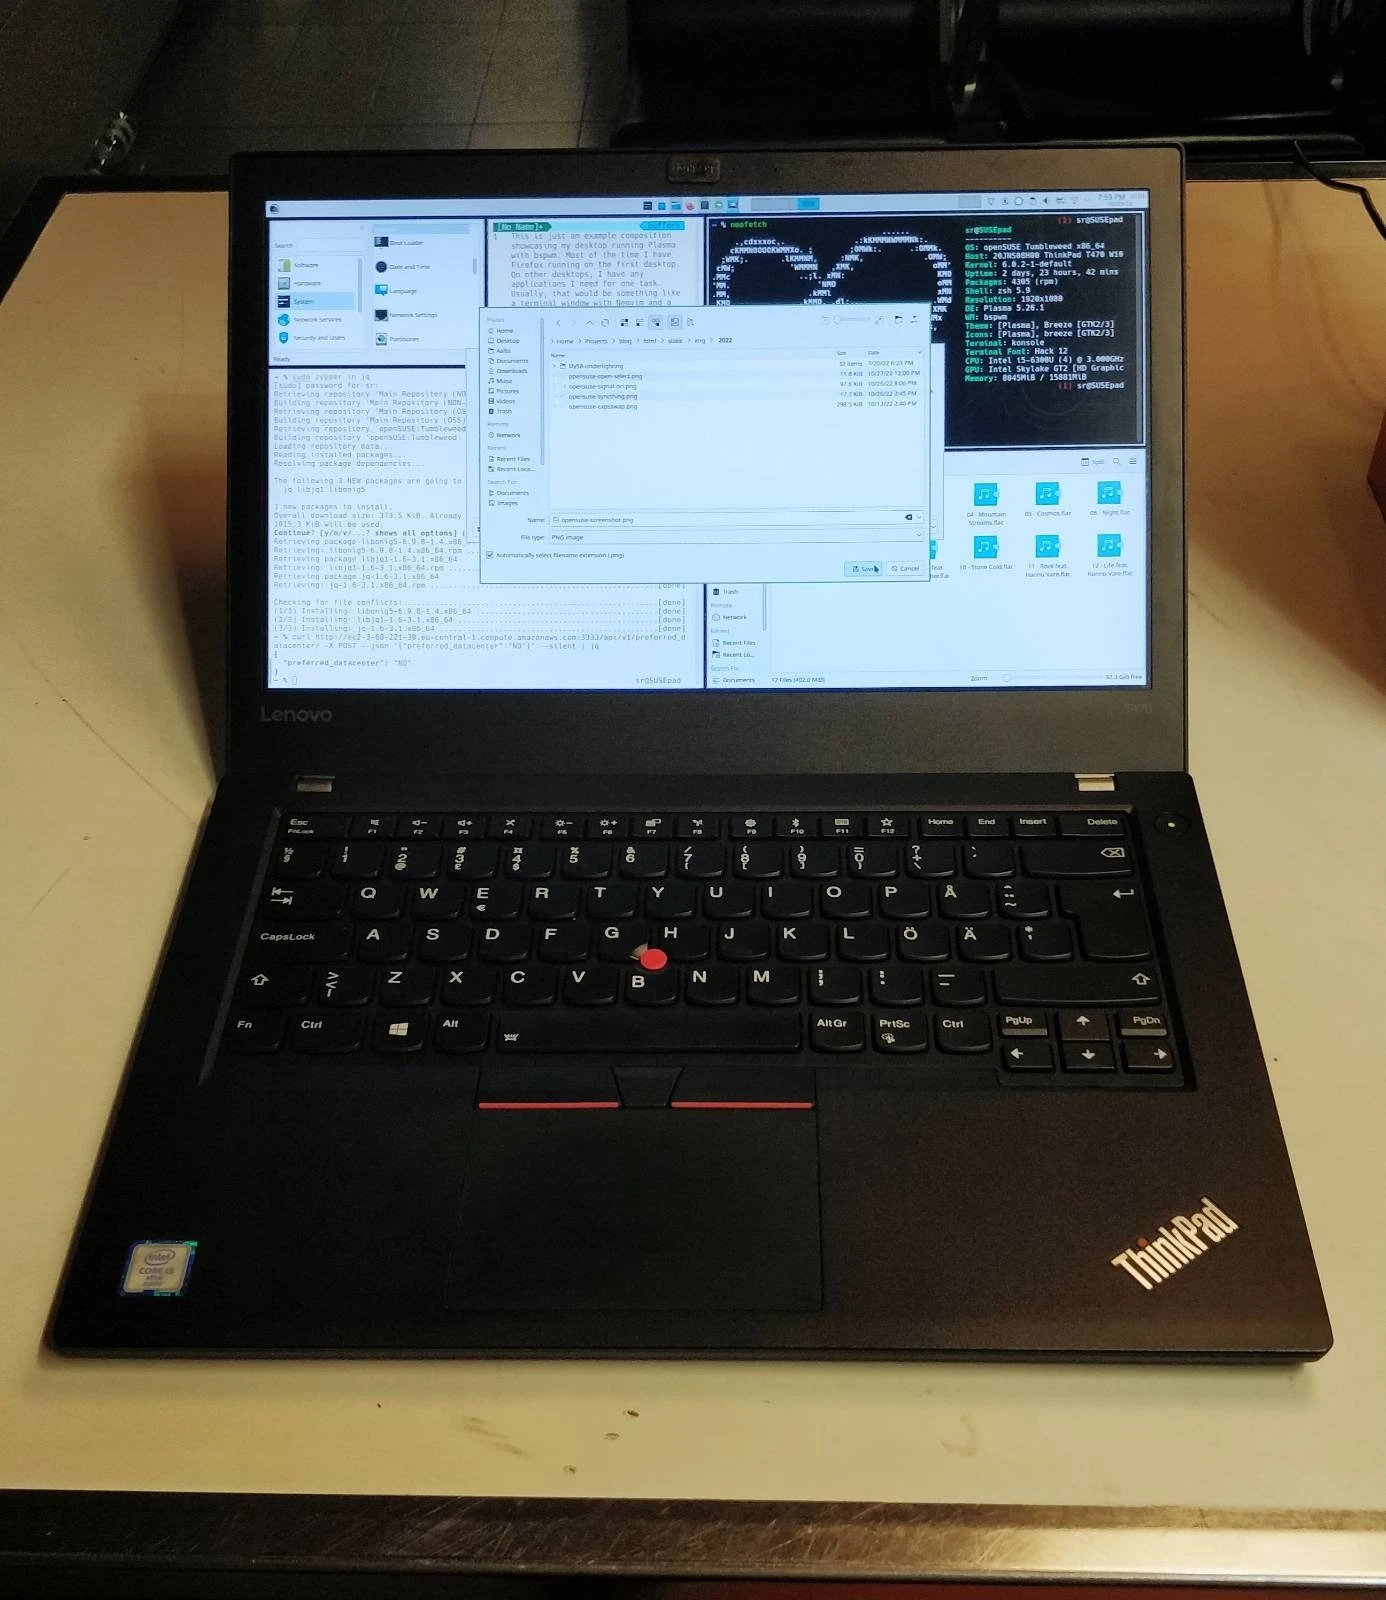
- neofetch (see images in this post for details)
- scrot (screenshot tool used by my screenshot.sh helper script)
- sqlite3
- wine (to run Windows software, in my case, a digital mixing console configuration software)
- zathura (pdf viewer)
Installing software outside the official repositories
Installing software from the official repositories is a good idea.
However, some software isn’t available there.
For example, the Signal messenger and wkhtmltopdf are not in the official repositories.
However, both can be found at software.opensuse.org.
One “experimental” and several “community” packages are available for Signal.
I asked the duck about the One Click Install and the experimental packages.
I discovered that One Click Install is a protocol that makes installing unofficial software easy.
It includes building instructions or other steps in a standardized format that the computer can understand.
I’m still unsure what the requirements for an experimental package are.
They seem more official and thus safer than the community packages, which individual community members maintain.
Setting up my dotfiles
I used bash <(curl -sL sampo.website/install-dotfiles.sh) to install my dotfiles.
My install script doesn’t have support for Zypper (yet), so I made sure to install the required packages manually beforehand.
Nice and easy!
Setting up Syncthing
I use Syncthing to synchronize my university directory between my devices and the university’s server. Syncing is helpful, as sometimes it is easier to use the servers and desktops of the university because of their hardware and software. The course Programming Parallel Computers comes to mind, as the university’s computers have the correct type of CPUs and GPUs for the course exercises. It also allows me to study anywhere, as I can access the files from any computer with a network connection and an SSH client. Additionally, even though Syncthing isn’t used to back up the files, I still have my essential files stored elsewhere other than on my laptop’s SSD. Thus, should my laptop get stolen or broken, I can continue working without losing the work since the last backup, as Syncthing updates the files as they change.
Installing Syncthing was very easy: zypper in syncthing.
After starting, I had to configure Syncthing to connect to another instance running on the university’s server.
It’s possible to configure Syncthing on the browser running on the server, for example, by setting up an SSH port forward.
However, Syncthing’s command-line interface can be used instead.
Adding the device and then sharing a directory on the server:
# replace $DEVICE_NAME, $DEVICE_ID, and $DIR_NAME with actual values
syncthing cli config devices add --name $DEVICE_NAME --device-id $DEVICE_ID
syncthing cli config folders $DIR_NAME devices add --device-id $DEVICE_ID
Then, use Syncthing web UI (by default, it runs at localhost:8384) to accept the directory shared by the server. I had copied the directory content, so the initial sync was fast.
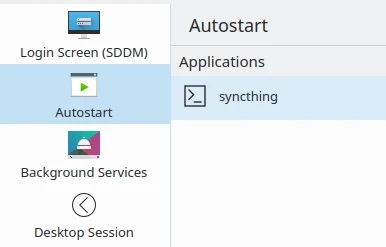
It’s vital to set Syncthing to start on login. I used Plasma’s system settings for that.
Configuring Plasma + bspwm
I have some configuration files saved in my dotfile repository,
for example, regarding my shell configuration that I’ve written about in an earlier blog post.
According to my dotfile repository, I’ve used Plasma with bspwm for approximately two years.
I love the combination of an easy, “it just works” desktop environment with GUI settings and working status bars, and I’ve learned to love tiling window management that doesn’t require me to use a mouse.
bspwm is a great window manager; using it feels natural and practical.
I use picom as a compositor.
It could provide visual improvements like transparent windows, but most importantly, it makes scrolling smoother when using Firefox.
# Install bspwm and picom
zypper in bspwm picom
In newer Plasma 5 versions, setting the KDEWM environment variable no longer works.
Thus, my dotfiles are outdated for that part.
Following
these instructions
I got it working using bspwm instead of i3.
I use a macOS-inspired global menu, meaning that the menu on the top of the window is moved to Plasma’s global top bar. It’s a nice feature in general, but it is especially cool with tiling window managers, as the regular menu sometimes feels clunky. Unfortunately, Firefox and some other applications don’t use the system’s menu and have other implementations instead. Also, there’s an issue where the menu of an application just closed is available even though the currently open application shouldn’t have a menu at all.
Opening KWallet automatically
KWallet stores secrets, like wifi passwords. It has “just worked” on other distributions, meaning it’s configured automatically, and there’s no need to open it manually. Configuring it to automatically open on login wasn’t difficult, but I had to do it manually. Time will show how it’ll react when I change my password.
Installing texlive
On the first morning with openSUSE, I had a deadline for a little learning assignment.
I was in a hurry and installed the texlive distribution.
Zypper felt slow, but on the other hand, there was the time pressure, and Texlive is an extensive distribution including thousands of packages.
Installation list:
- texlive-extratools
- texlive-pdfx
- texlive-lastpage
- texlive-biber
These packages allowed me to compile my assignment, but I’ll have to see if I need to install more packages if I use advanced TeX files.
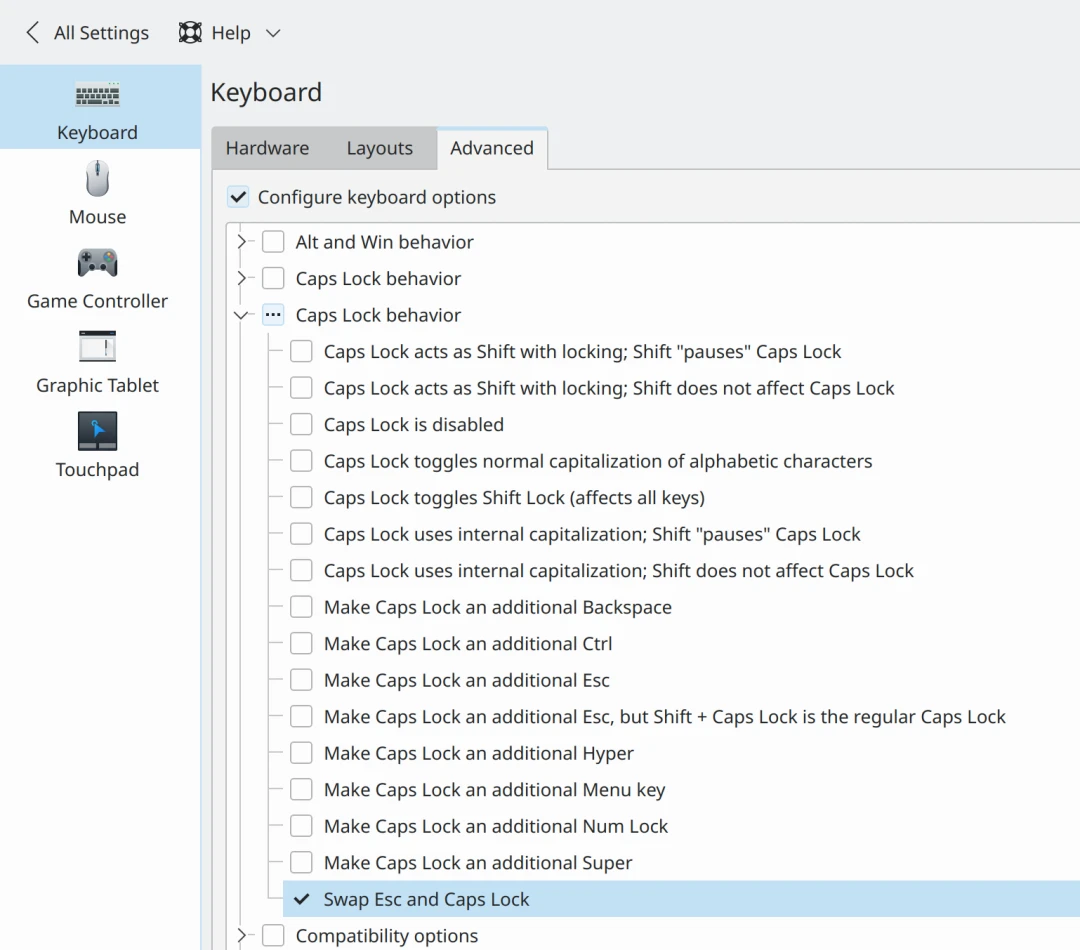
Swapping CapsLock with Esc
I have the CapsLock key swapped with Esc on all of my devices. I’ve also configured my keyboard with that setting in mind, i.e., CapsLock is easily available (as it’s interpreted as Escape). The change is straightforward in Plasma’s system settings application.
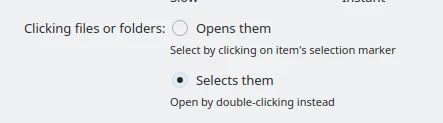
Disabling the “click to open” feature
By default, Plasma opens directories when clicked instead of selecting them. I’m not used to this setup and want the navigation to work the same way as in other systems I use. Thus, I changed the behavior using Plasma’s system settings. Now, a single click selects an item, and a double click opens it.
Setting the hostname
For some reason, the openSUSE installer doesn’t ask for a hostname during the installation. However, changing it is easy:
sudo hostnamectl set-hostname SUSEpad
After a reboot, the new hostname is used.
Configuring sudo
By default, openSUSE has the sudo command set up to ask for the root user’s password instead of the regular user’s password.
I’m used to a system where users are added to the sudo or wheel group, or the user is explicitly given access defined in the sudoers file.
I like the security reasoning that the root user shouldn’t have a password, but getting the root privileges is done with a regular user and that account’s password.
I decided to use the sudo group approach.
Editing sudo configuration is done like in any other Linux distribution using visudo.
sudo groupadd sudo
sudo usermod -a -G sudo sr
sudo visudo
And when editing the sudoers file, I added the following lines:
## Allow members of group `sudo` to execute any command (sr 2022-10-26)
%sudo ALL=(ALL:ALL) ALL
Additionally, I commented out the following two lines (see the # at the beginning of the lines):
# Defaults targetpw     # ask for the password of the target user i.e. root
# ALL   ALL=(ALL) ALL   # WARNING! Only use this together with 'Defaults targetpw'!
After logging out and back in, running sudo asks for my password instead of root’s.
However, when using GUI tools like YaST or GParted, the system prompts for root’s password.
It could be that deactivating the root account and using the administrator’s account isn’t doable or practical on openSUSE.
It could be a design choice, or maybe it’s just a legacy.
I would like to disable the root account’s password, but it seems unreasonable.
Having an active root account isn’t a big issue, and I won’t be fixing it now.
After writing this blog post, but just before publishing it, there was an
update that broke
sudo
for many Tumbleweed users.
sudo started to ask for the user’s password by default, but many users hadn’t configured themselves to run commands as root and relied on sudo to ask for root’s password.
I wasn’t affected, as I had configured sudo.
Also, there was a simple workaround by using su.
One can expect these things to happen now and then when working with rolling release distributions.
As a side note, I also saw someone claiming that openSUSE would be moving away from using the root user’s password to administer the system.
I’d welcome that change!
Setting up a swap file
I installed openSUSE with the default filesystem: Btrfs. Against the installer’s guidance, I didn’t set up a swap partition. I thought I could use a swap file like I had on Debian. It turns out swap files aren’t straightforward with Btrfs. However, the trustworthy Arch Wiki provides excellent information about swap files on Btrfs.
First, I create a new subvolume in YaST → System → Partitioner.
Select the top-level Btrfs root and click “Add Subvolume”.
I chose to use @/swap as the path.
Make sure to set the No_COW attribute as instructed by the Arch Wiki by checking the “noCoW” option.
Then, create the subvolume by clicking “Accept”.
Now that I have the subvolume for the swap file mounted at /swap,
I’ll create and activate the actual swap file.
sudo dd if=/dev/zero of=/swap/swapfile bs=1M count=$((1024*8)) status=progress
sudo chmod 0600 /swap/swapfile
sudo mkswap /swap/swapfile
sudo swapon /swap/swapfile
Now, when running, e.g., free -h, I can see an 8.0GiB swap available.
To make the swap file permanently available for swapping, I added the following line to the end of the /etc/fstab file:
/swap/swapfile none swap sw 0 0
Setting a battery charge limit
Often, I only use my laptop while it’s plugged in. I’m only seldom in a situation where I need to use my laptop for a long time without external power. Thus, hoping it’d help the batteries stay in good condition, I used Plasma’s Advanced power settings to stop the charging at 80%. It’s enough for most of my mobile usage, and I can change the setting whenever I want to charge the batteries fully.
Issues faced
Having to enter the encryption key twice on boot
I have to input my disk encryption key twice during boot.
It’s a bit of an annoying behavior, and there are some workarounds.
The issue is that the /boot is located on the root partition, which is encrypted.
Thus, Grub must decrypt it before showing me the Grub boot menu.
However, Grub cannot pass the key securely to the operating system, so the OS asks me to input it again.
There’s a wiki article
mentioning a solution.
It seems reasonable and safe, and it works like a charm.
Wrong keyboard layout on boot
After implementing the above fix, I was only asked for the encryption key once. However, that input has a wrong keyboard layout, meaning that any special characters won’t be inputted as expected. That’s inconvenient, but a workaround is to learn to type the required characters with the default layout (US). I don’t boot my computer that often, and there’s a workaround, so I haven’t tried solving it.
Printing
Unfortunately, I sometimes have to print. On my ZenBook, printing worked out of the box with Debian testing. However, when I attached the printer by USB, it was recognized, but the system could not print. I tried configuring it in YaST with no luck, as there weren’t printer-specific drivers available, and the generic drivers didn’t work. I ended up downloading the drivers directly from the printer manufacturer. I don’t particularly appreciate downloading scripts and running them as root, but it installed working drivers, and printing was a breeze after that.
Battery quirks
The T470 has a dual battery setup. Plasma can show them correctly, but there are some quirks. Plasma does something strange when the first battery reaches 5% charge on battery usage. It’s unclear whether it briefly visits the low battery state or handles the battery change in a way like pulling out the power cord. The battery sometimes seems to be charging even though the power cord isn’t attached, at least on the login screen. However, this isn’t much of an issue.
Afterthoughts
My most substantial feelings regarding this are the following:
- Despite its notable flaws, Why did I use my ZenBook for so long?
- Why didn’t I get ThinkPad sooner, maybe a few laptops back?
- Some things were better with ZenBook, but this is an upgrade overall.
- OpenSUSE feels like a great choice!
Regarding the first point, I probably thought these were issues that could be fixable and that it was my fault for using an OS other than Windows. And I got work done with it, and the issues were just annoying, and they didn’t block working. And for the second point, ThinkPads seem fantastic laptops and generally run Linux well.
I’ve described earlier that some specifications, like the display, processor, and storage of the ZenBook, are better than ThinkPad’s. Some differences aren’t usually described in the technical details; I’ve noticed that the ThinkPad doesn’t seem to wake from suspension as fast as the ZenBook does. I like the design of both computers and even though the keyboards are different, both are pleasant to type with. The T470 was released a few years earlier than my ZenBook’s model. Overall, the experience has been much better with the ThinkPad, so it’s an upgrade regardless of the small things I had to downgrade.
OpenSUSE provides a desktop Linux experience where everything works right out of the box. Using the Tumbleweed edition allows me to change some stability to cutting-edge software, which is a great trade-off. OpenSUSE provides a sound, working system that I can customize as I desire.
There’s always something more to do, and I’ll continue tweaking and configuring whenever there’s something that I wish to be otherwise. One thing would be setting time and date formatting to a Finnish locale, but it hasn’t annoyed me enough to get it done. Perhaps one day 🙂
I’m delighted with my current laptop situation. Regardless of the laptop and its operating system, there are always some issues. I’ve experienced some quirks and even a crash, but that happens. After a long time, I feel confident and comfortable with my laptop. I’m hoping to get many valuable years out of the current laptop, and when it’s time to upgrade, I’ll check the ThinkPad section first. Also, buying a second-hand laptop was a great experience.
Did you like this post?
I'll announce new posts in the following channels:
See my blog's front page to read my other posts.
You can reach me on Mastodon: @sampo@hachyderm.io. I'd love to hear from you!